How to Setup GAuth Authenticator with Gmail
Please make sure you have enabled Two Factor Authenticator in Gmail. If this has not been done, please follow the instructions listed here.
Step 1. Please add the Chrome Extension GAuth Authenticator by clicking here and click Add to Chrome. (Pictured Below)
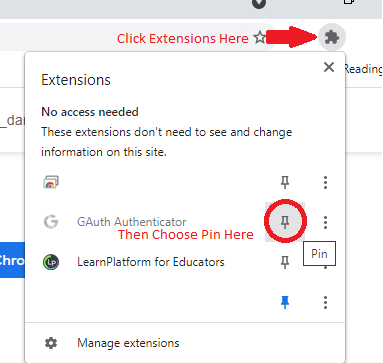
Step 2. In the Top Right Hand corner of the screen, choose the extensions icon that looks like a puzzle piece. After you click on that, then click on the thumbtack beside of GAuth Authenticator to Pin GAuth Authenticator. (Pictured Below)
Step 3. Go to https://myaccount.google.com/
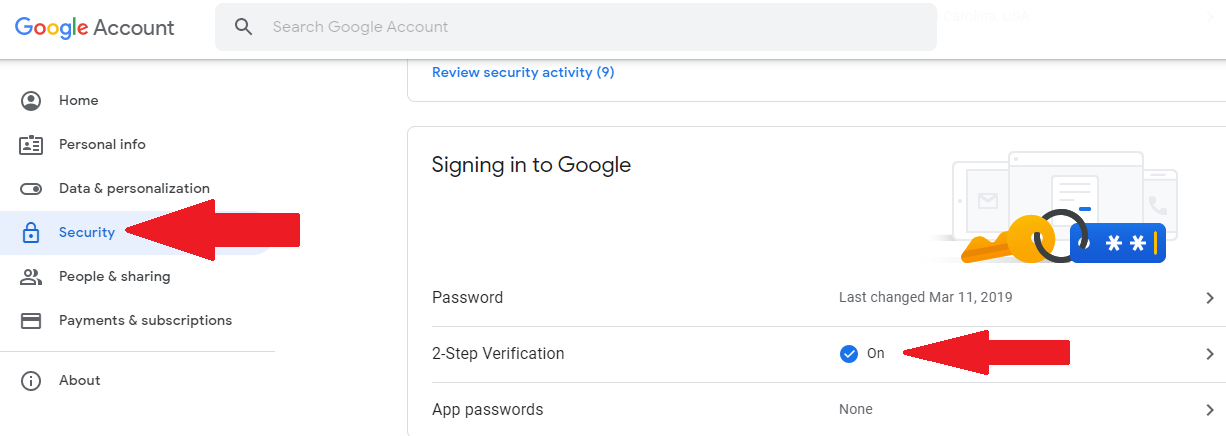
Step. 4. Click Security on the left hand side of the screen, and then click where it says On beside 2-Factor Verification (Pictured below)
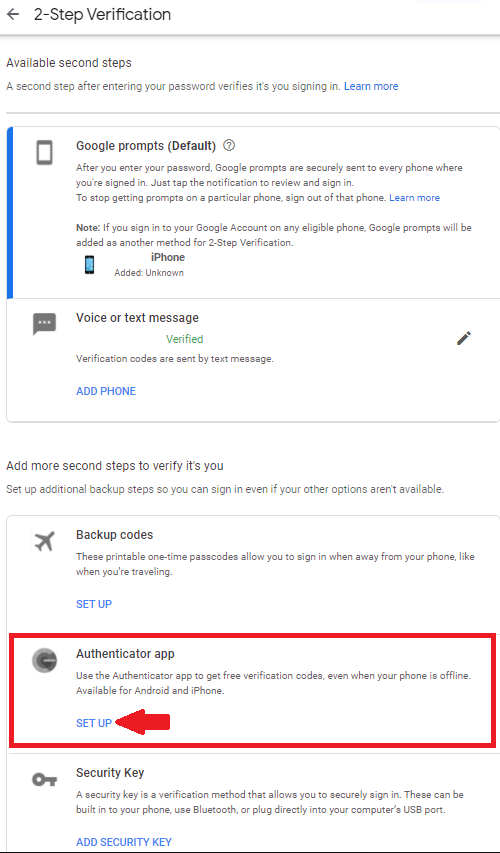
Step 5. Scroll down, and find where it says Authenticator app and then click SET UP (Photo Below)
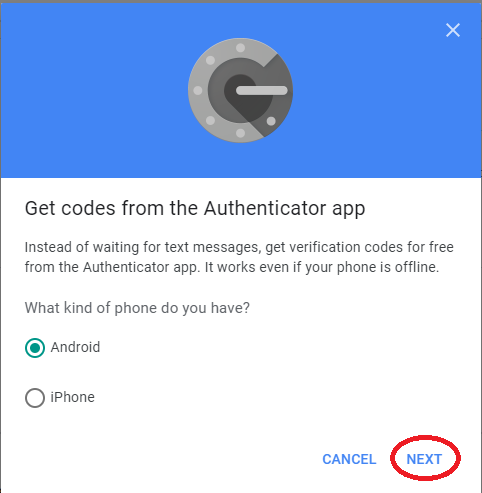
Step 6. You can leave the selection on Android, and then click Next. (Photo Below)
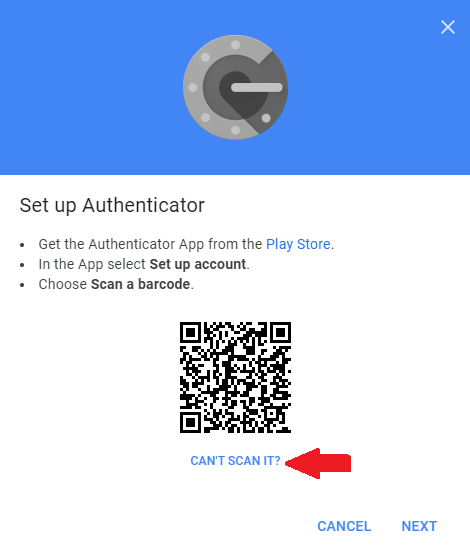
Step 7. On the next screen, you will Choose Can't Scan It? below the QR Code. (Photo Below)
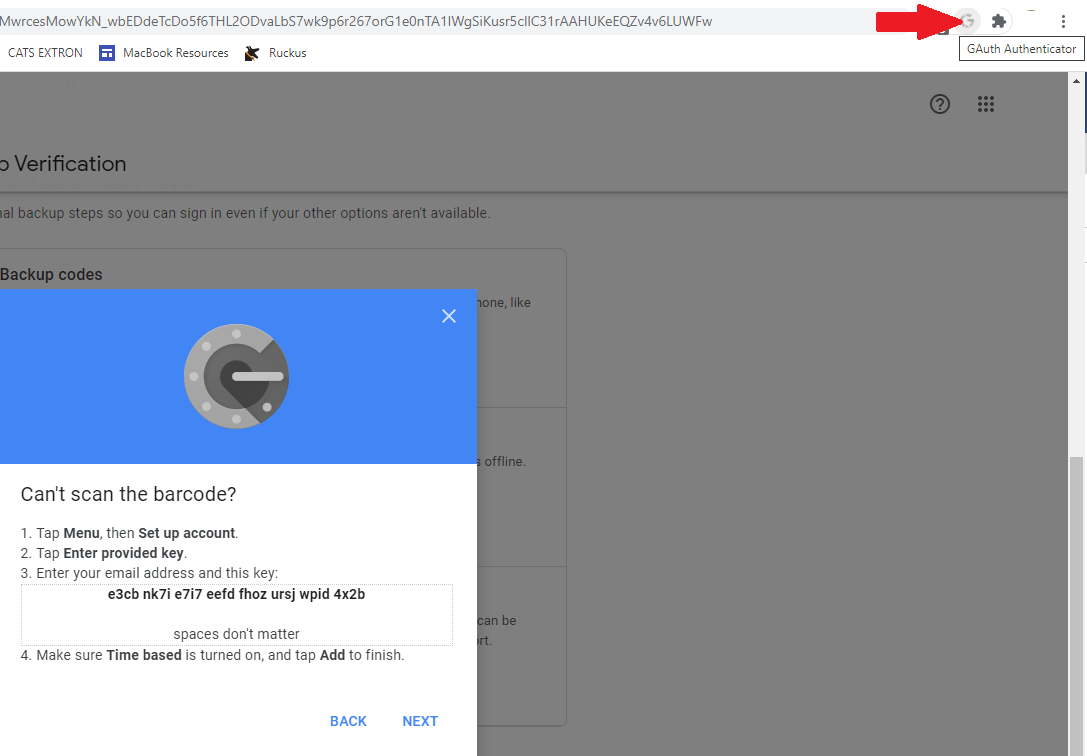
Step 8. Next you will Click on GAuth Authenticator icon in the top right.
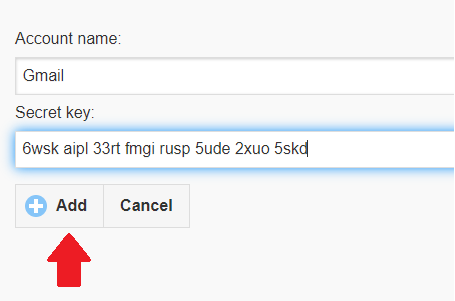
Step 9. On the next step, you will need to select the pencil in the top right, and then click Add. (Photo Below)
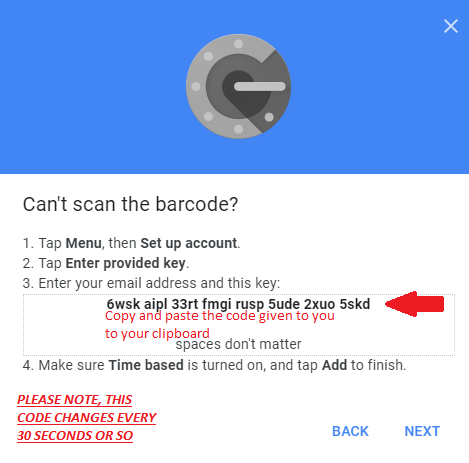
Step 10. You will then go to Add the Account - Make the Account Name Gmail or ISS Gmail, then you will have to go back to the Chrome tab that has the Key (from Step 8) and then paste it in the text box that says Secret key and then click Add.


