PC How To's
How to Take a Screenshot on PC
Open Snipping Tool and take a screenshot
Mouse and keyboard
-
To open Snipping Tool, select the Start button, type snipping tool, and then select it in the search results.
-
To choose the type of snip you want, select Mode (or, in older versions of Windows, the arrow next to New), and then choose Free-form, Rectangular, Window, or Full-screen Snip. When making free-form or rectangular snips, use your mouse to select the area that you want to capture.
-
To take a new screenshot using the same mode you used last, select New.
-
Use the Save and Copy buttons at the top of the snip to save or copy it to the clipboard.
Keyboard only
- To open Snipping Tool, press the Start key, type snipping tool, and then press Enter. (There's no keyboard shortcut to open Snipping Tool.)
-
To choose the type of snip you want, press Alt + M keys and then use the arrow keys to choose Free-form, Rectangular, Window, or Full-screen Snip, and then press Enter. (Alt + M is available only with the latest update to Windows 10). When making a rectangular snip, hold down Shift and use the arrow keys to select the area you want to snip.
-
To take a new screenshot using the same mode you used last, press Alt + N keys.
-
To save your snip, press Ctrl + S keys. To copy it to the clipboard, press Ctrl + C keys.
How to Use Dell Command Update
How to use Dell Command Update software in three easy steps
PLEASE MAKE SURE THAT YOU PLUG YOUR DEVICE UP TO POWER BEFORE STARTING THIS PROCESS
**Please repeat these 3 steps after you have completed them one time**

Step 1. Type Dell or Dell Command in the search to find the software.

Step 2. Click on Check

Step 3. Click Install
This will install any necessary driver or firmware updates, you may see a message to restart after the install has completed.

Please repeat steps 1-3 once you have restarted your laptop to see if there are any pending installs/restarts, if you fail to do this your issues may not be resolved.
How to Add A Cloud Printer to Windows
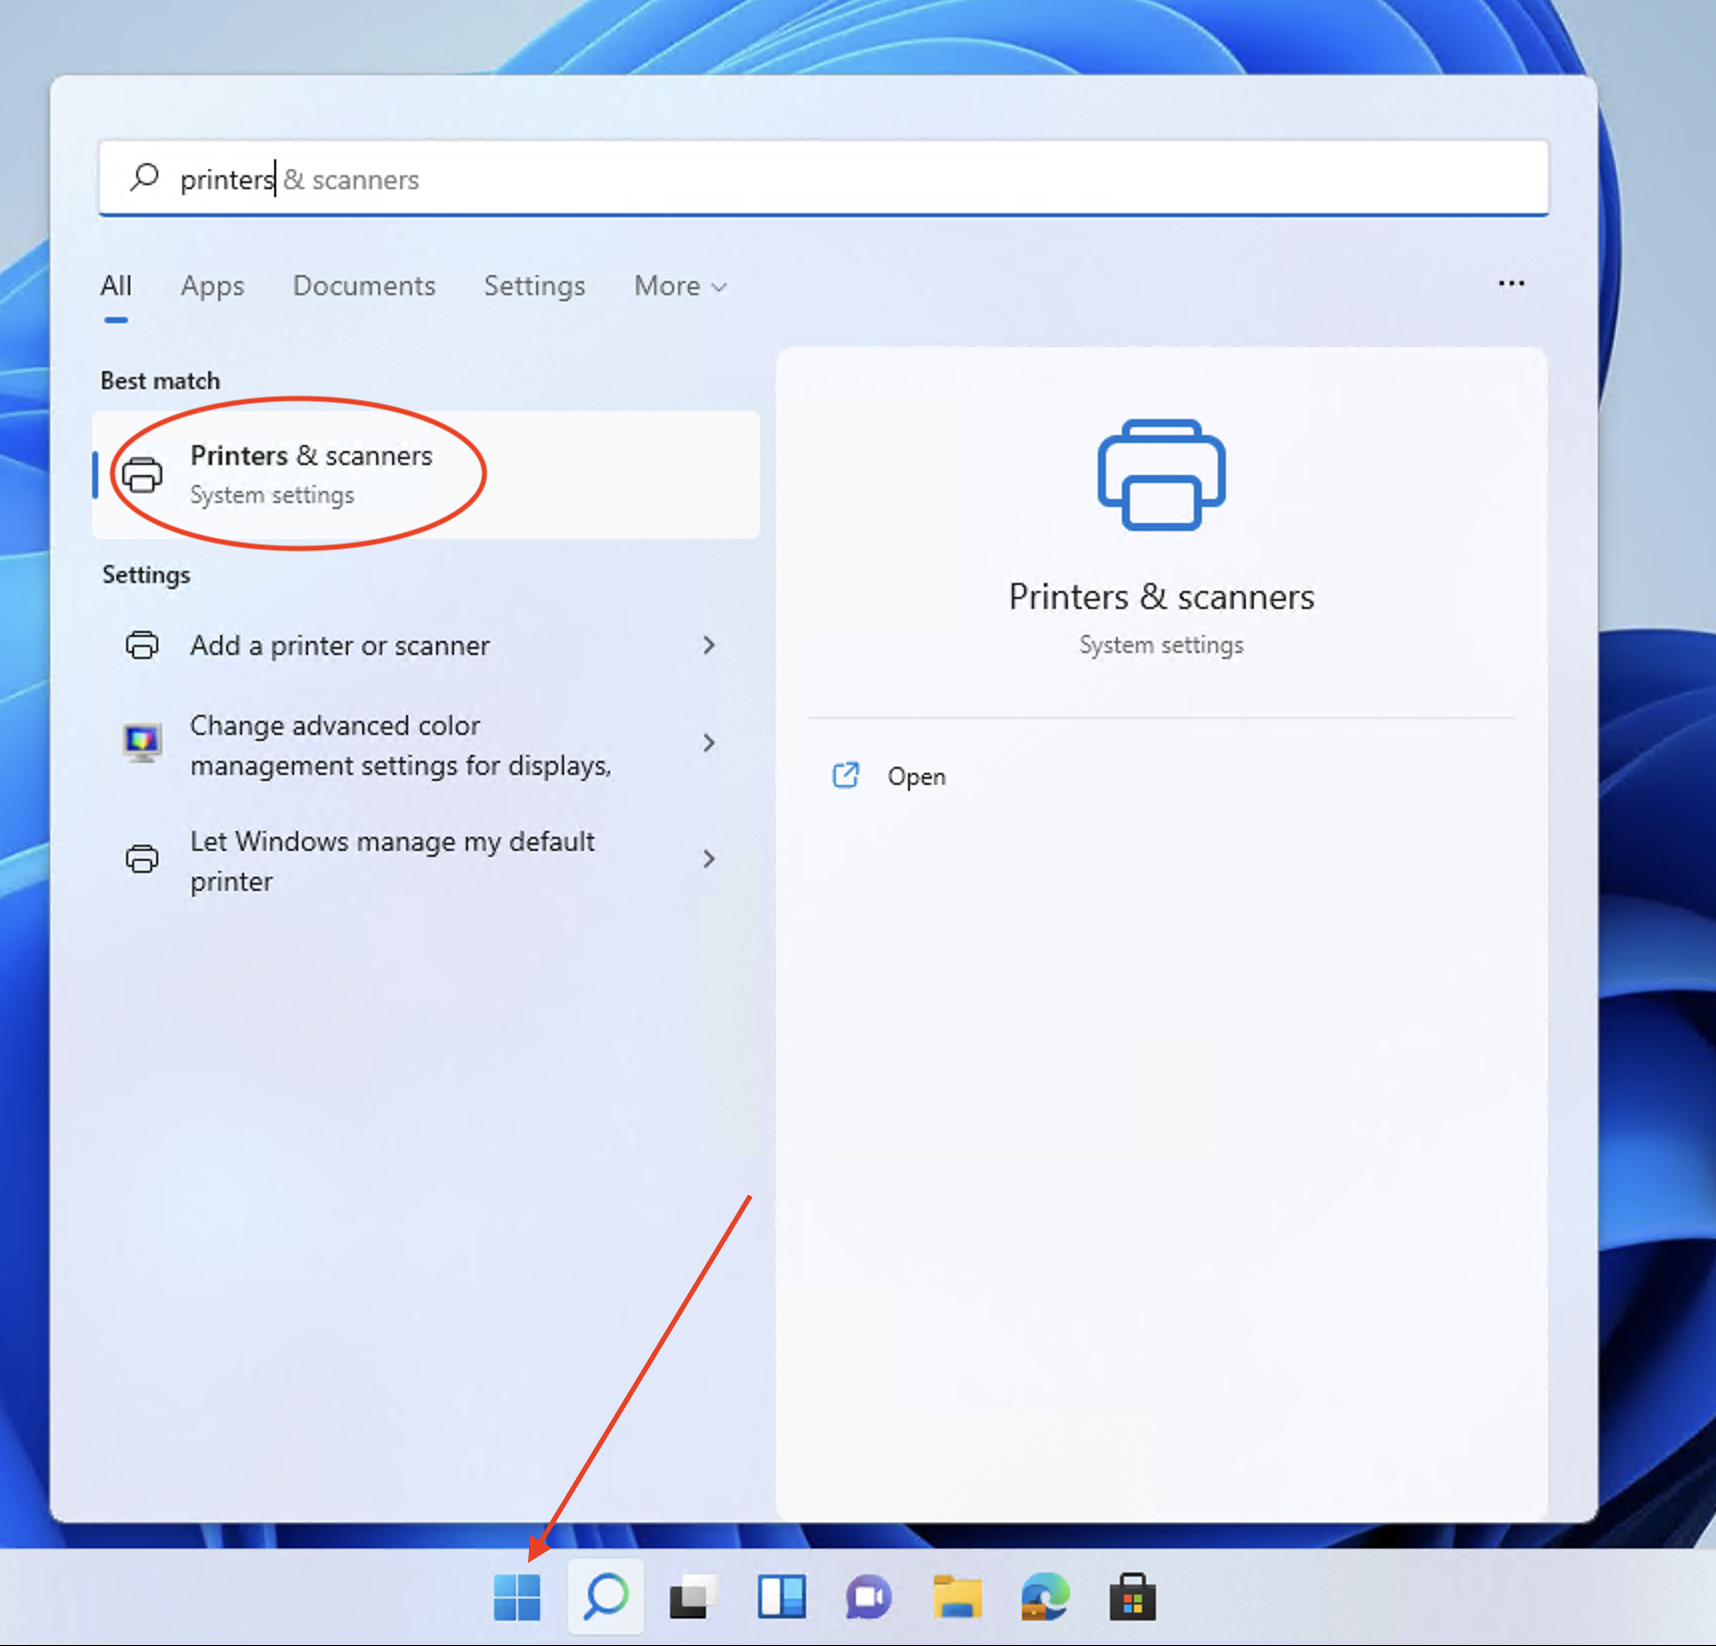
- Go to Start and type Printers - and then you should locate Printers & Scanners

-
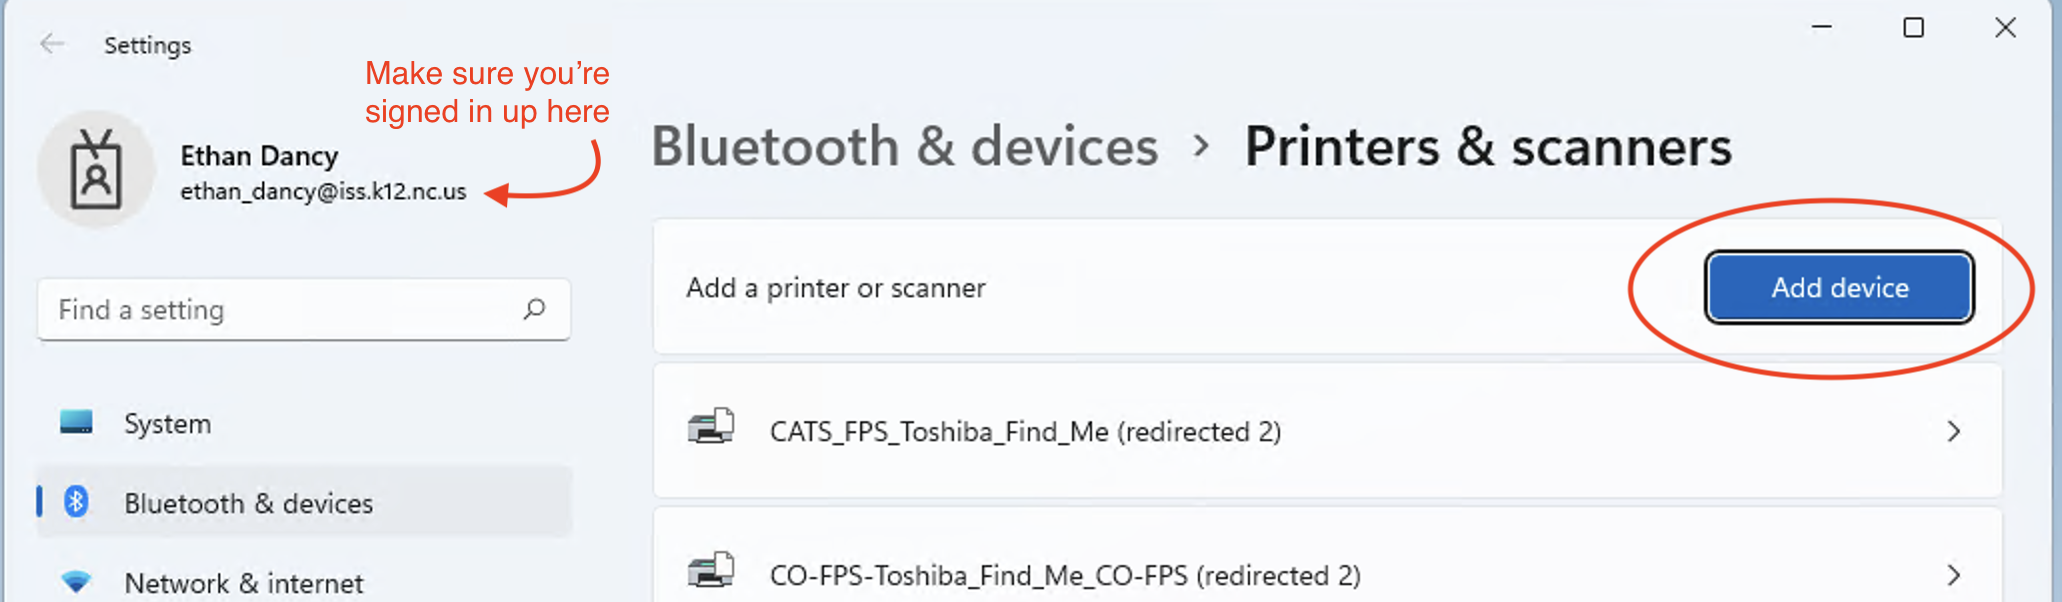
Make sure you are signed in in the top left, and then click Add Device

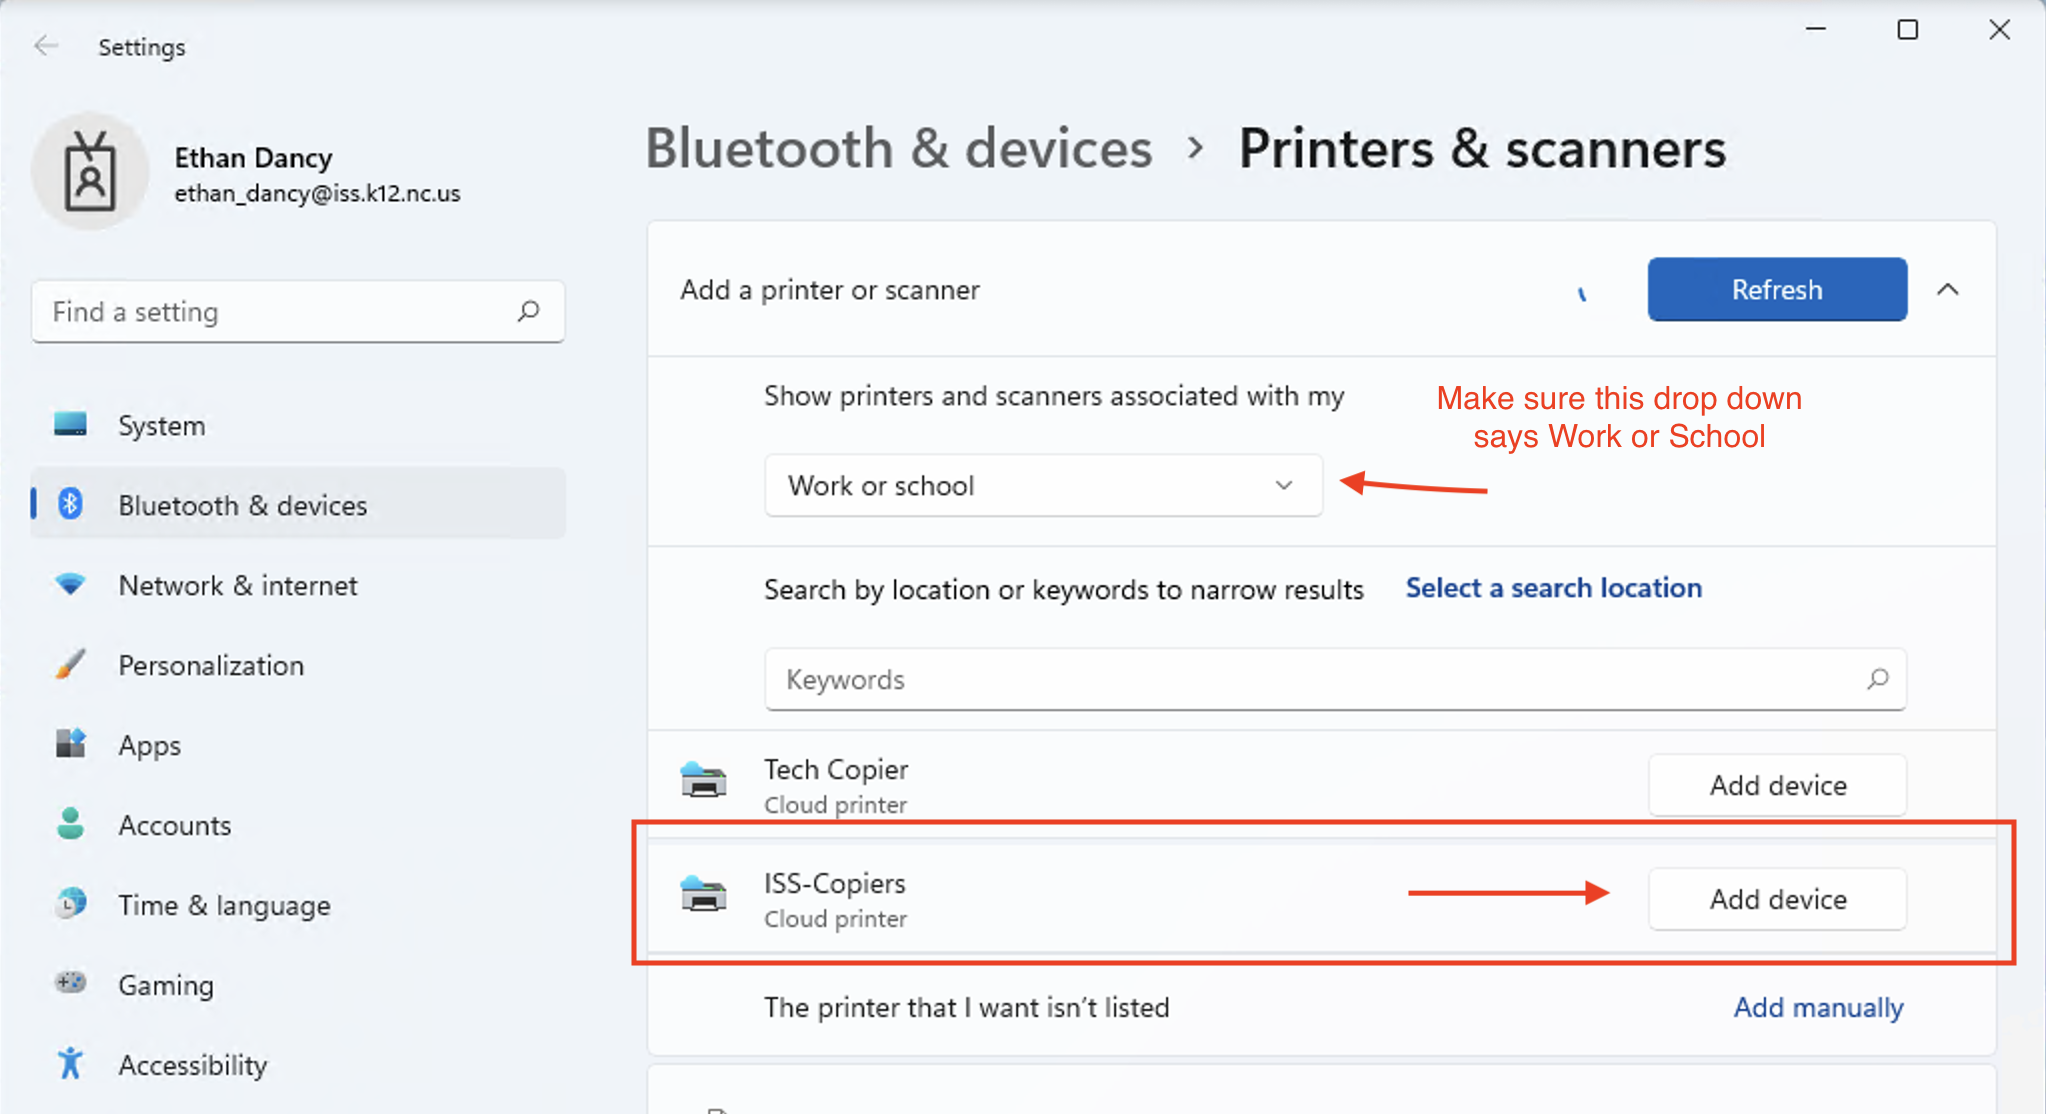
- Make sure to change the drop down to Work or School, it will then will show you a few options for Cloud Printers. Click Add Device beside ISS-Copiers.

- Now, if you print to this printer called ISS-Copier, you can retrieve it on any copier with your timekeeper number.