Mac How To's
- How to Take a Screenshot on Mac
- How to Use Apple TV
- Basics of Laptop Maintenance
- Mac Shortcuts
- How to Forget a Network on Mac
- How to login to Macbook with Xcreds
- How to Update Your Macbook OS
- Add ISS Copiers to Macbook (Pre OS Sonoma)
- How to Print to Copiers on a Mac
How to Take a Screenshot on Mac
Take a screenshot on your Mac
You can capture the entire screen, a window, or just a portion of the screen.
How to take a screenshot on your Mac

- To take a screenshot, press and hold these three keys together: Shift, Command, and 3.
- If you see a thumbnail in the corner of your screen, click it to edit the screenshot. Or wait for the screenshot to save to your desktop.

How to capture a portion of the screen

- Press and hold these three keys together: Shift, Command, and 4.
- Drag the crosshair
 to select the area of the screen to capture. To move the selection, press and hold Space bar while dragging. To cancel taking the screenshot, press the Esc (Escape) key.
- To take the screenshot, release your mouse or trackpad button.
- If you see a thumbnail in the corner of your screen, click it to edit the screenshot. Or wait for the screenshot to save to your desktop.
How to capture a window or menu

- Open the window or menu that you want to capture.
- Press and hold these keys together: Shift, Command, 4, and Space bar. The pointer changes to a camera icon
 . To cancel taking the screenshot, press the Esc (Escape) key.
- Click the window or menu to capture it. To exclude the window's shadow from the screenshot, press and hold the Option key while you click.
- If you see a thumbnail in the corner of your screen, click it to edit the screenshot. Or wait for the screenshot to save to your desktop.
Where to find screenshots
By default, screenshots save to your desktop with the name ”Screen Shot [date] at [time].png.”
In macOS Mojave or later, you can change the default location of saved screenshots from the Options menu in the Screenshot app. You can also drag the thumbnail to a folder or document.
How to Use Apple TV
-
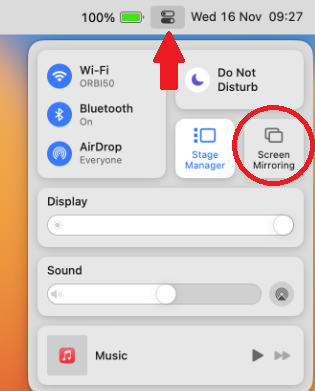
Click Control Center
 in the menu bar in the top right of your Macbook, click the Screen Mirroring icon
  , then choose your Apple TV.
-
If asked, enter a four-digit code on your Mac.
-
To set whether your desktop mirrors or extends your Mac screen, click the Screen Mirroring icon
 , then choose Mirror Built-in Display or Use As Separate Display.
Basics of Laptop Maintenance
.png)
Mac Shortcuts
|
Take a picture of the whole screen |
Command (⌘)-Shift-3 |
|
Take a picture of part of the screen |
Command (⌘)-Shift-4, and then drag the crosshair pointer to select the area. Continue to press the mouse button, release the keys, and then press Shift, Option, or the Space bar while you drag to resize the selection area. When you are ready to take a picture, release the mouse button. To cancel, press Escape before you release the mouse button. |
|
Take a picture of a window or the menu bar |
Command (⌘)-Shift-4, press the Space bar, move the camera pointer over the area to highlight it, and then click. To cancel, press Escape before you click. |
|
Take a picture of a menu, including the title |
Click the menu to display the menu commands, press Command (⌘)-Shift-4, and drag the crosshair pointer over the area. To cancel, press Escape before you click. |
|
Take a picture of the menu without its title |
Click the menu to display the menu commands, press Command (⌘)-Shift-4, press the Space Bar, move the camera pointer over the menu to highlight it, and then click. To cancel, press Escape before you click. |
How to Forget a Network on Mac
How to Forget a Wireless Network on Mac
- Click the Wi-Fi icon in the top-right corner of the Mac menu bar.
- Select Open Network Preferences....
/article-new/2019/11/1how-to-forget-wireless-networks-on-mac-.jpg?lossy)
- Click Advanced.
/article-new/2019/11/how-to-forget-wireless-networks-on-mac-.jpg?lossy)
- Click a network in the list to select it. (To select multiple networks, hold the Command key while clicking them.) You can also drag networks higher up the list to prioritize them over other local networks.
- Click the minus ("–") icon below the list to forget the selected network.
/article-new/2019/11/3how-to-forget-wireless-networks-on-mac-.jpg?lossy)
How to login to Macbook with Xcreds
Welcome to our new login screen for Mac Devices.
If you've logged in to this device before, simply sign in as usual. If you have not signed into this device before or have had your password reset, you can follow these instructions to get your local profile created/updated.
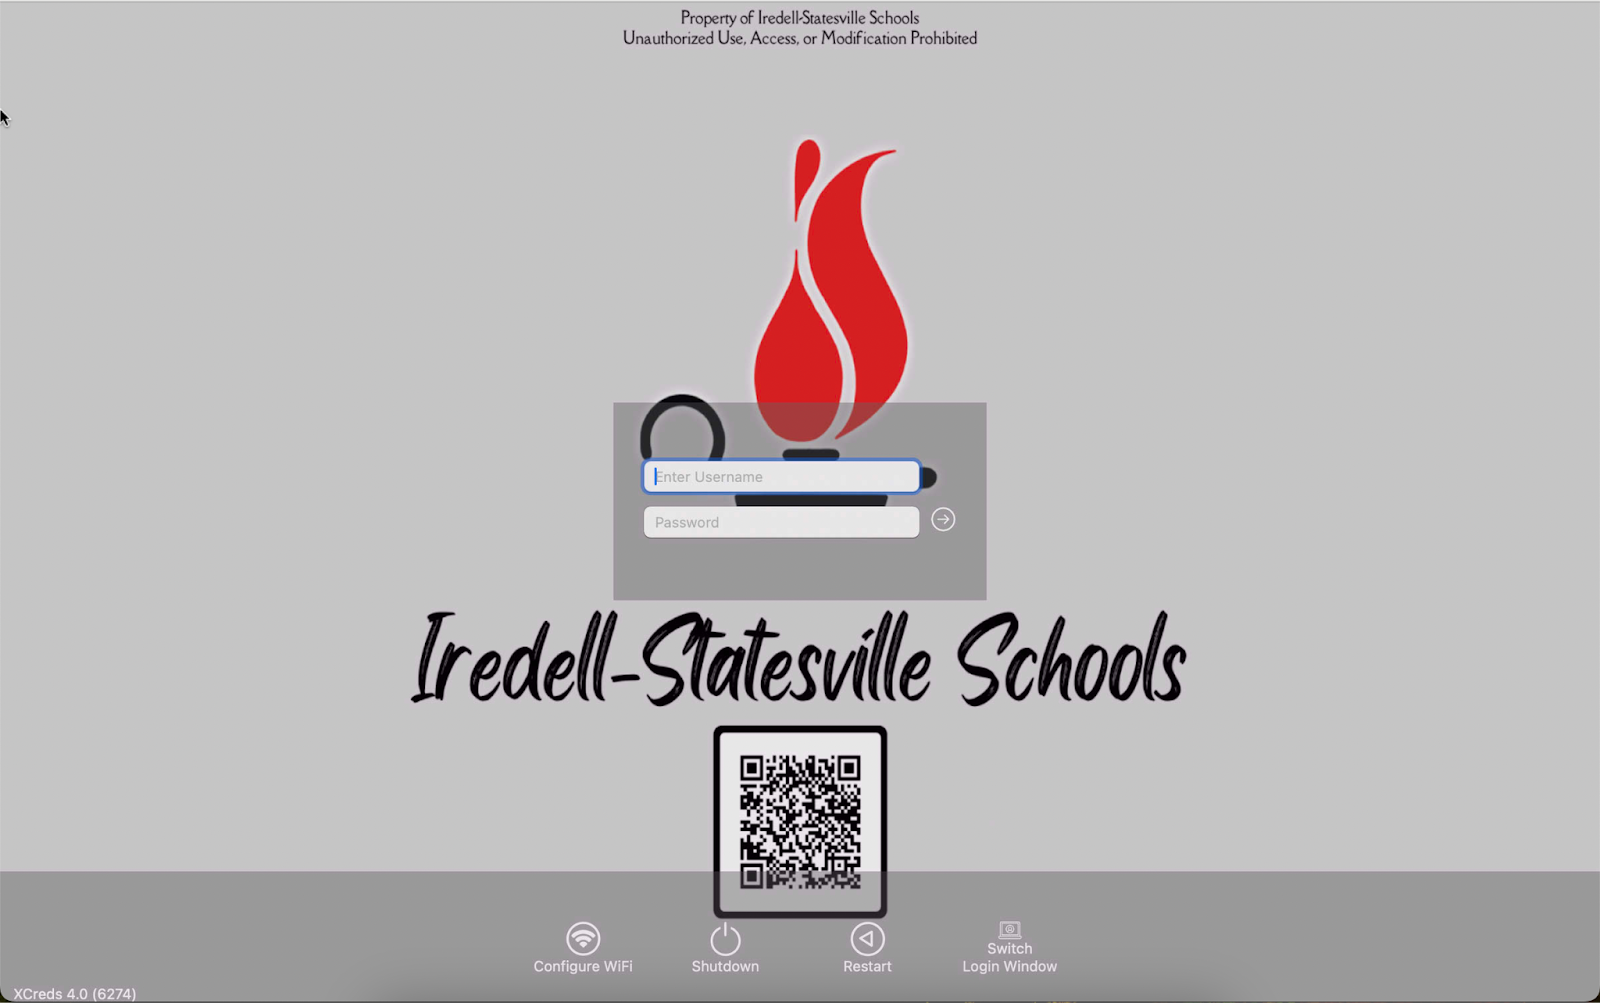
To update or create your local account, follow these steps
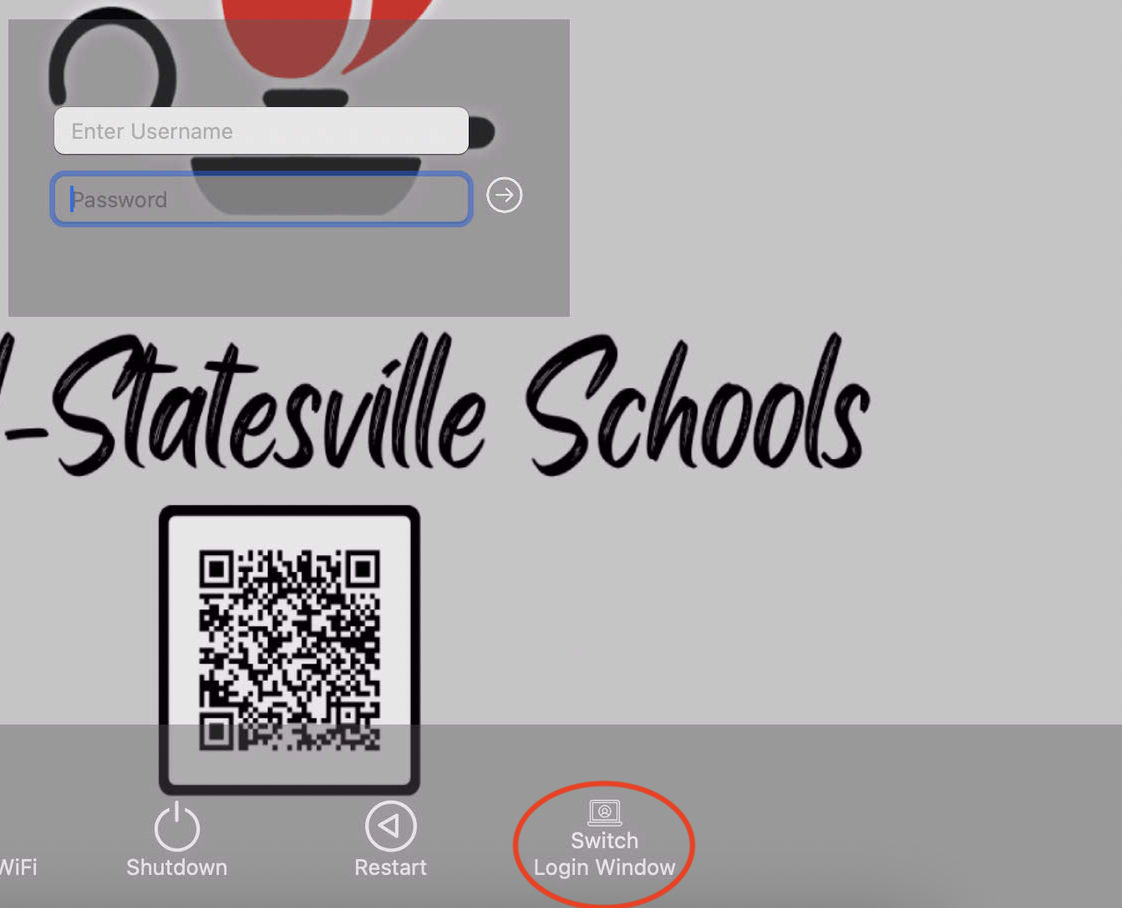
Start by clicking on the “Switch login window” button on the lower right hand side of the screen.
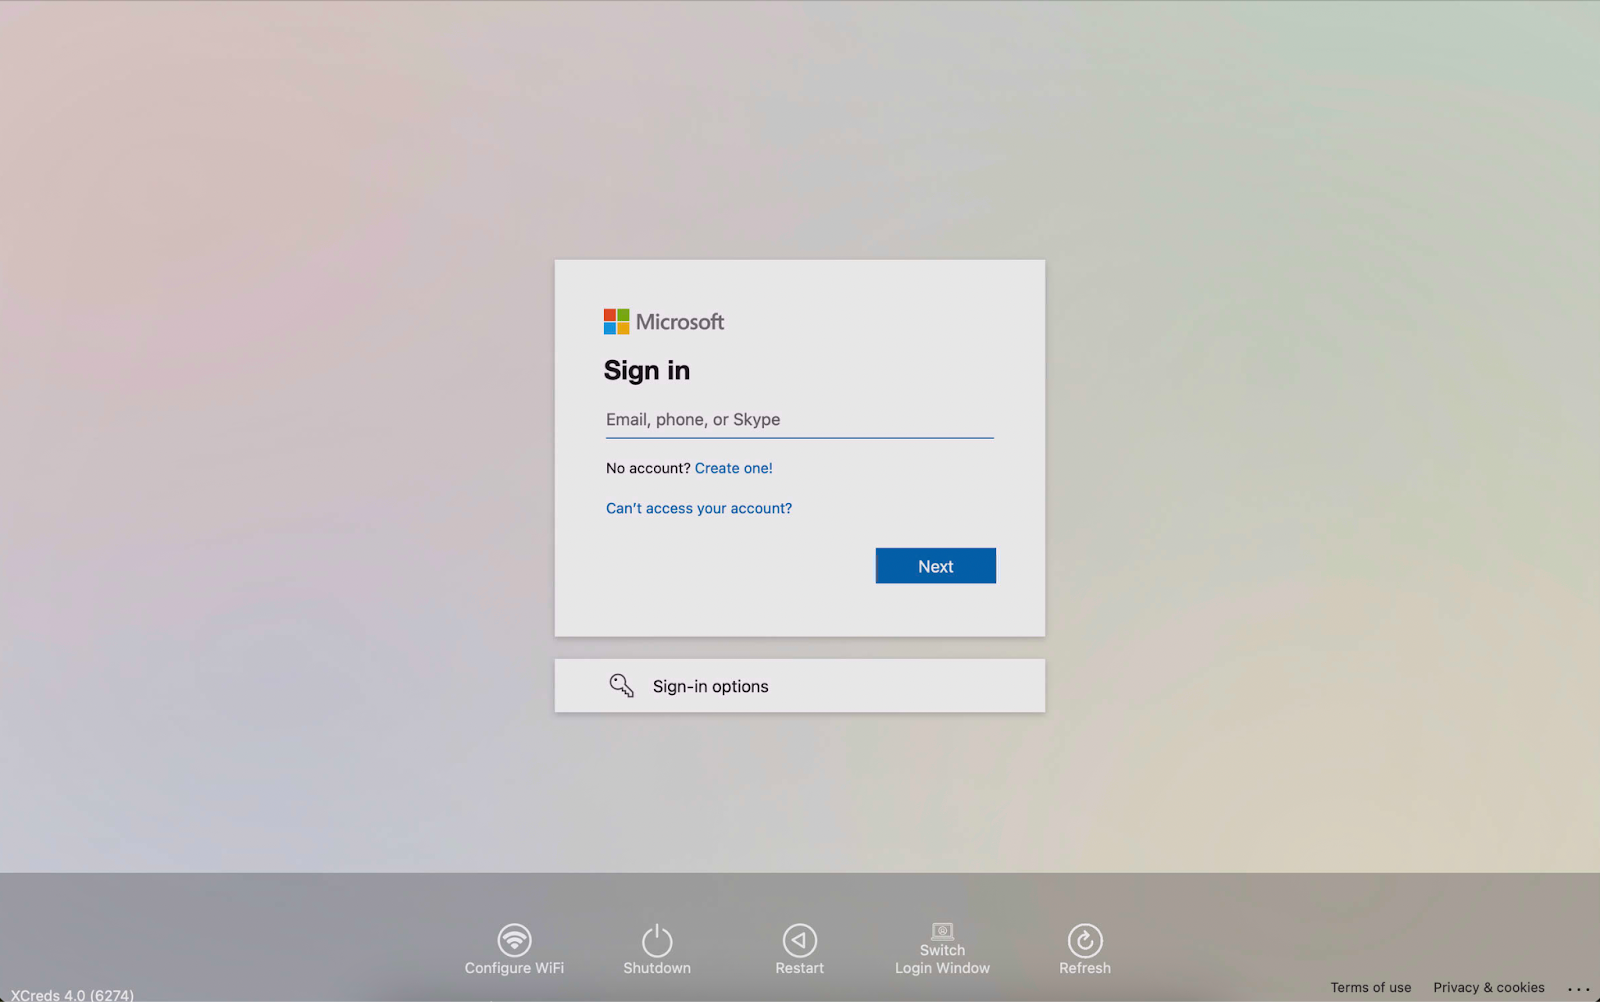
This should change the login window to be the same as below. Enter your full district email and click next.
The window will change again and you will be prompted to enter your password. This is the same password that you use to get into your email.
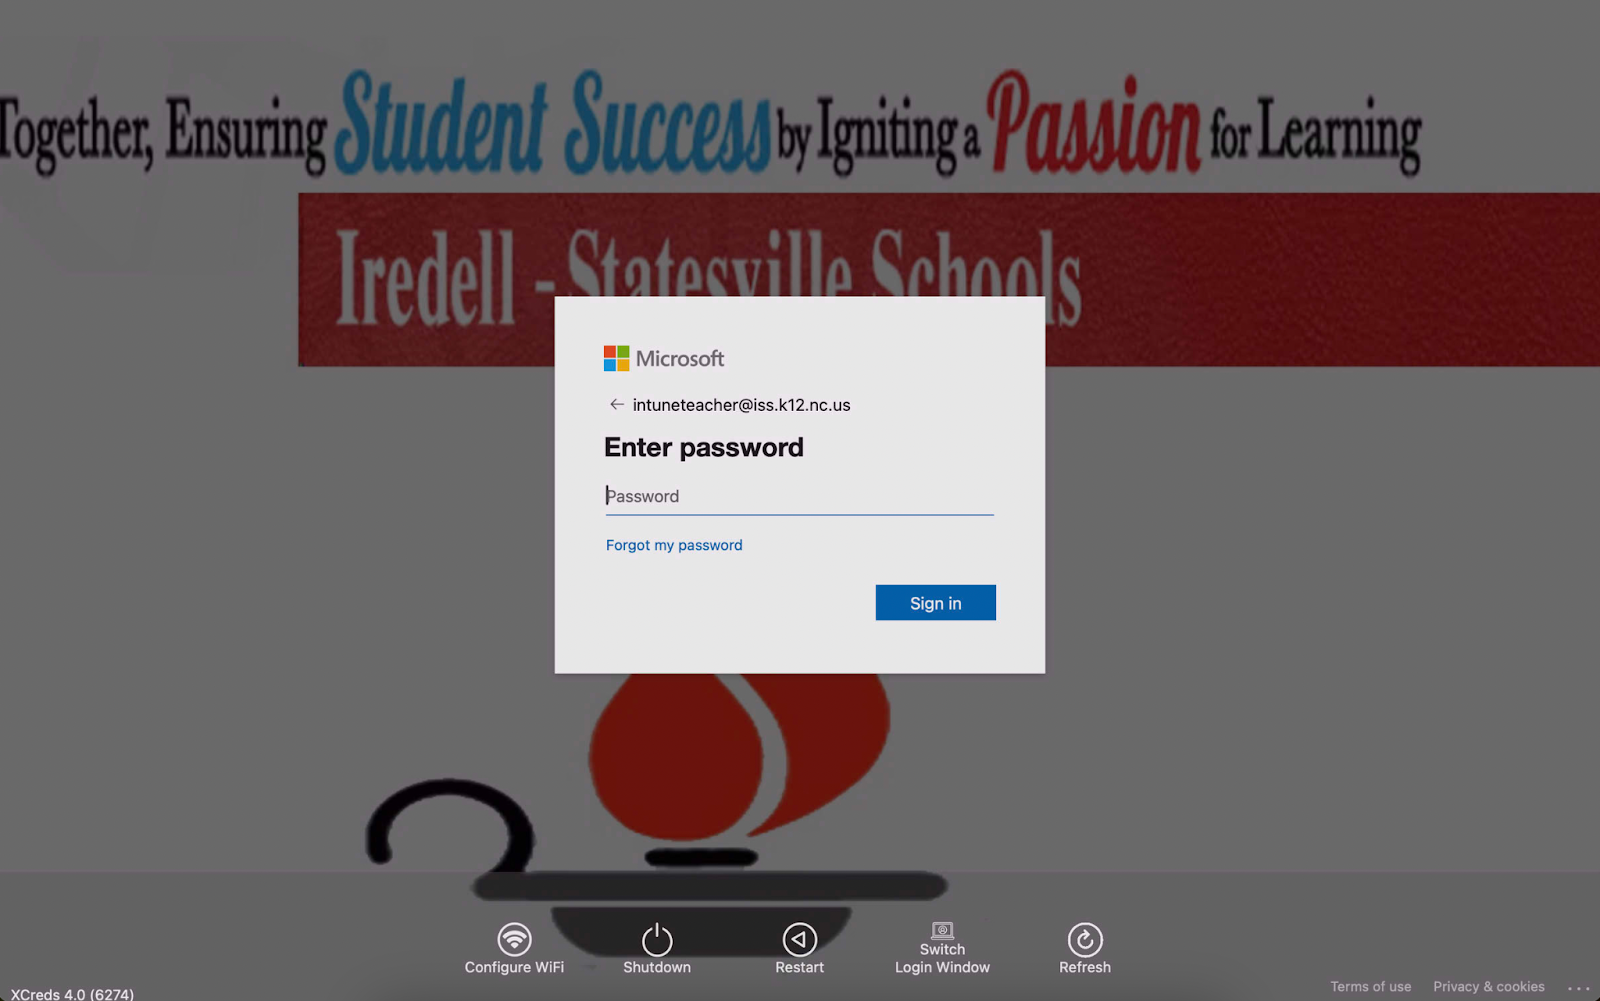
Once it accepts your password, it will create/update your local account and let you in. You will not have to repeat this process unless you get your password changed or your device reset. From this point forward you may log in on the default screen with just your username and password.
How to Update Your Macbook OS
Before you begin
-
Before installing new software, it's a good idea to back up your files to Google Drive.
-
Make sure that your Mac is connected to the internet. You should be able to access websites or receive email, for example.
Use Software Update
-
Open Software Update:
-
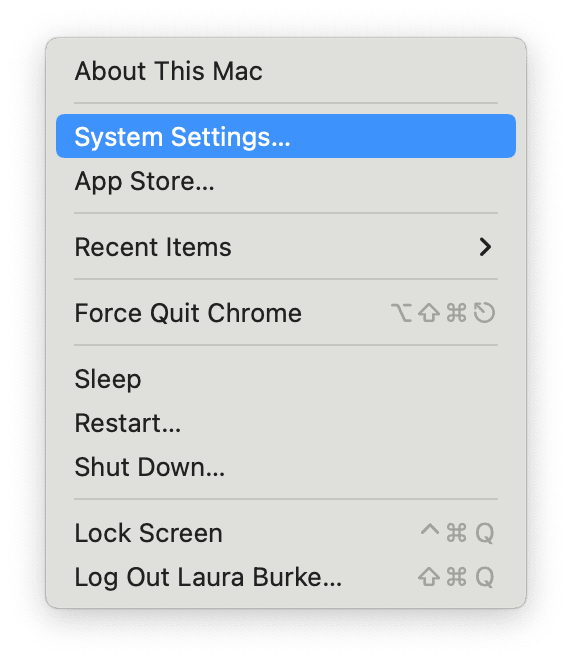
From the Apple menu in the corner of your screen, choose System Settings. Click General in the sidebar of the window that opens, then click Software Update on the right.
-
If you don't have System Settings in the Apple menu , choose System Preferences instead. Then click Software Update in the window that opens.
-

-
-
When you open Software Update, it automatically begins checking for new software.
-
If new software is available for your Mac, click the button to Update or Upgrade.
-
-
Before installation begins, you will be asked to enter your administrator password. It's the password you use to log in to your Mac.
-
During installation, your Mac might restart and show a progress bar or blank screen several times. If installation is
 ]
]
If this does not work, or it asks you for an owner password, please submit a workorder at iss.sherpadesk.com
Add ISS Copiers to Macbook (Pre OS Sonoma)
|
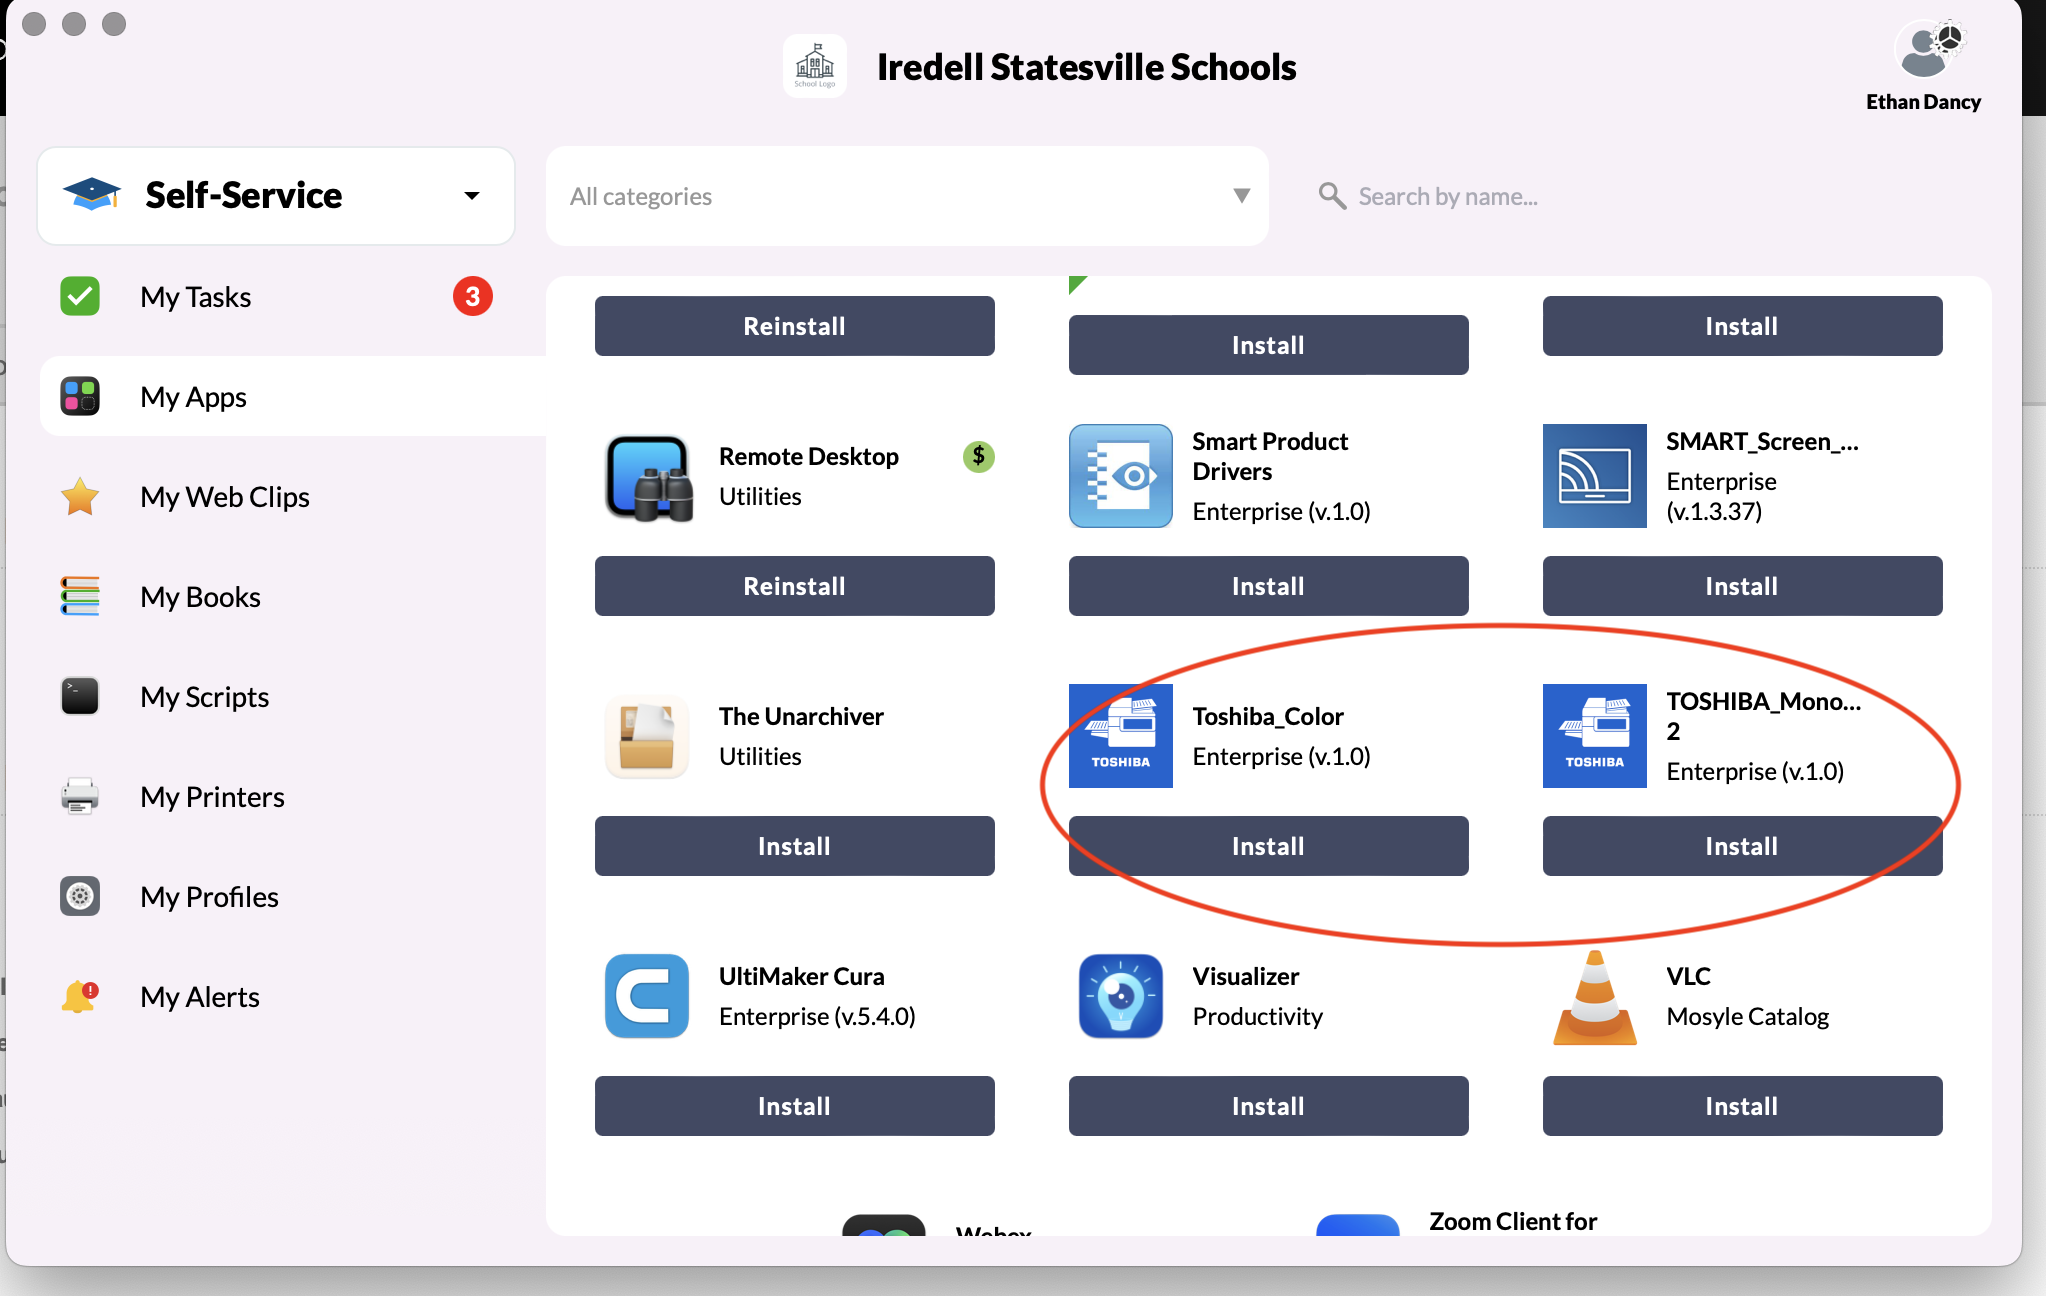
1. Go To Mosyle, and go to Self Service and install the Toshiba Drivers (pic below)
|
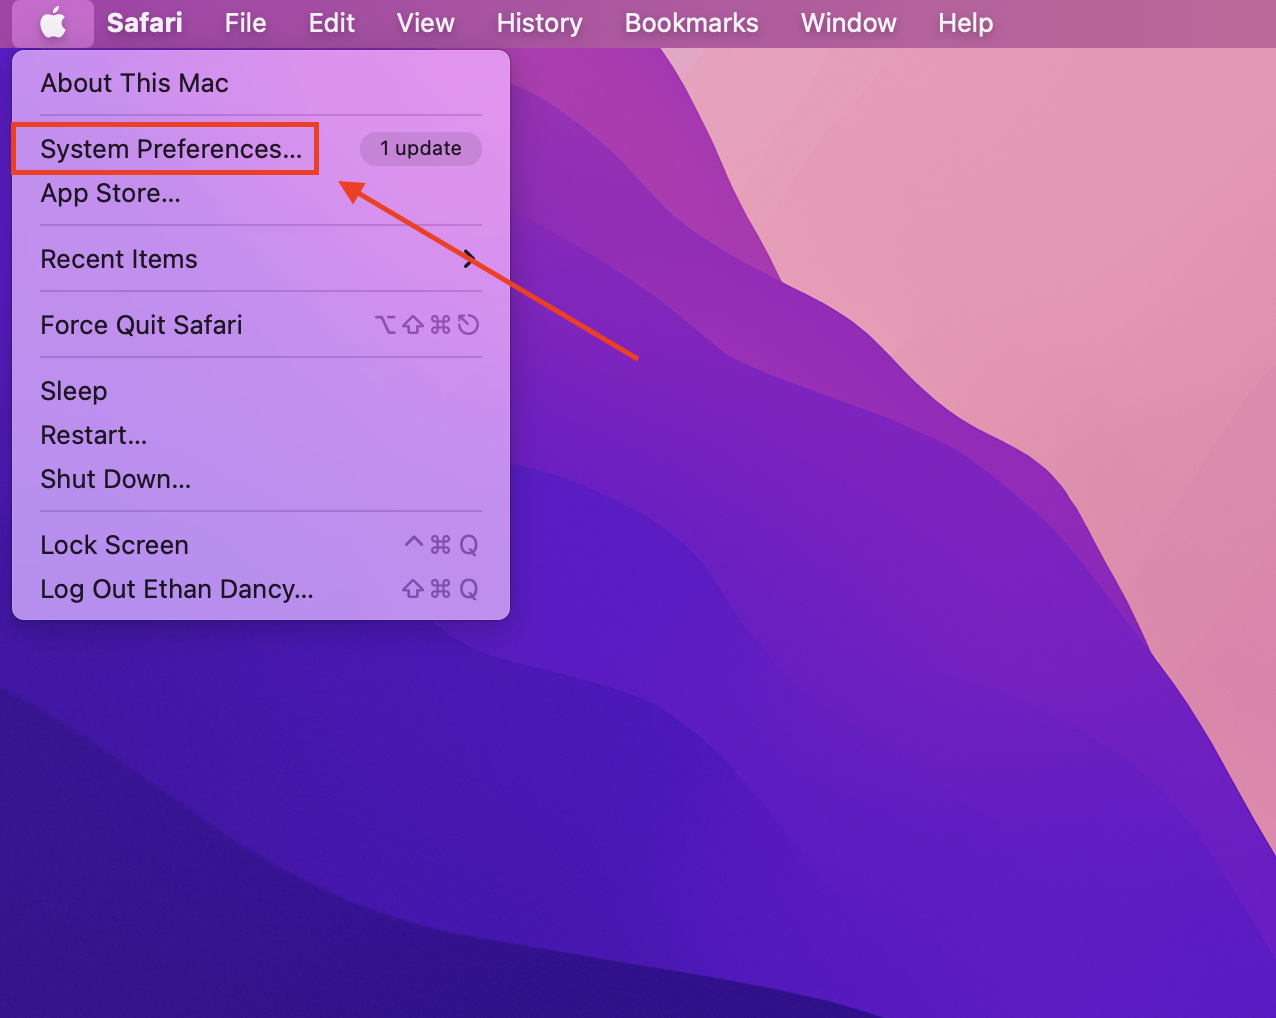
2. Click on the Apple in the top left of your screen, and then click on System Preferences
|
|
|
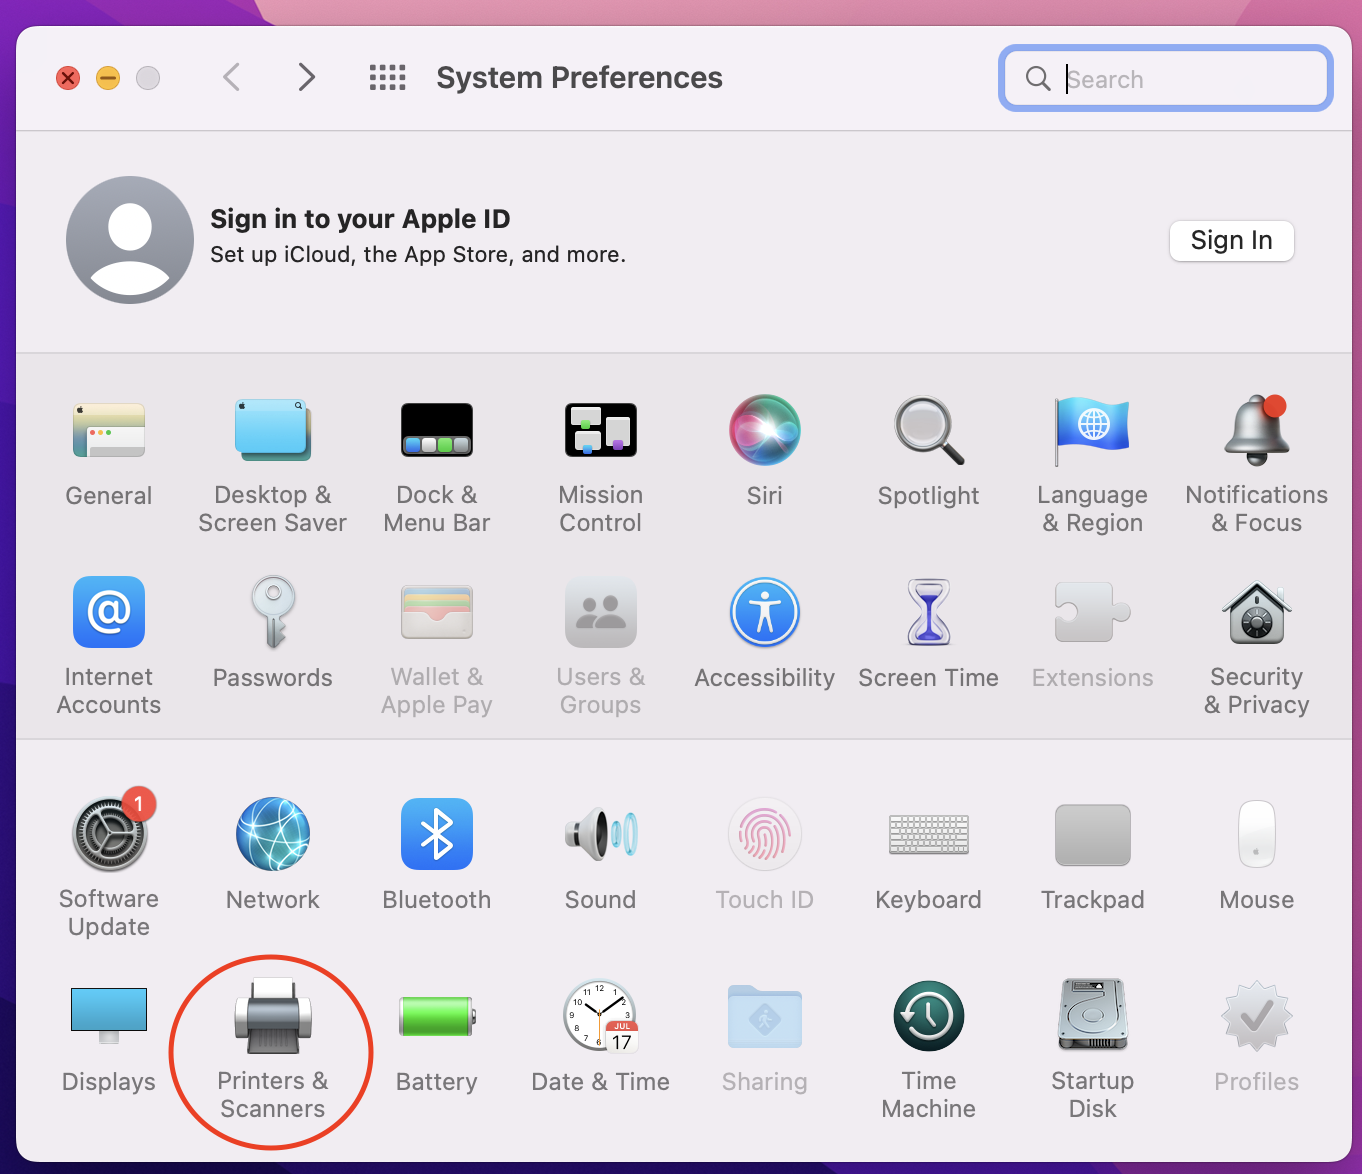
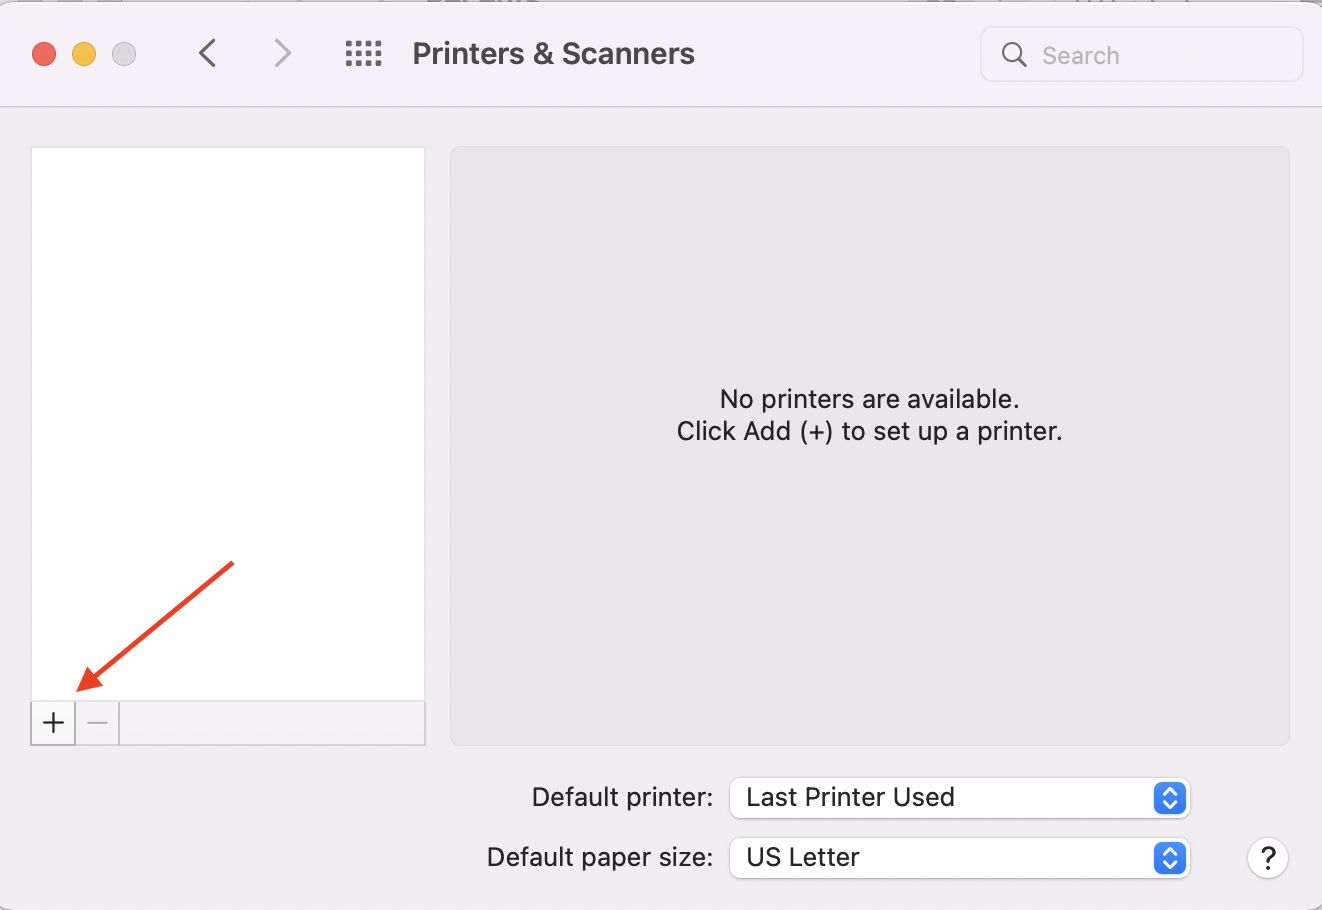
3. Open up Printers & Scanners
|
4. Click the plus sign in the bottom left
|
|
|
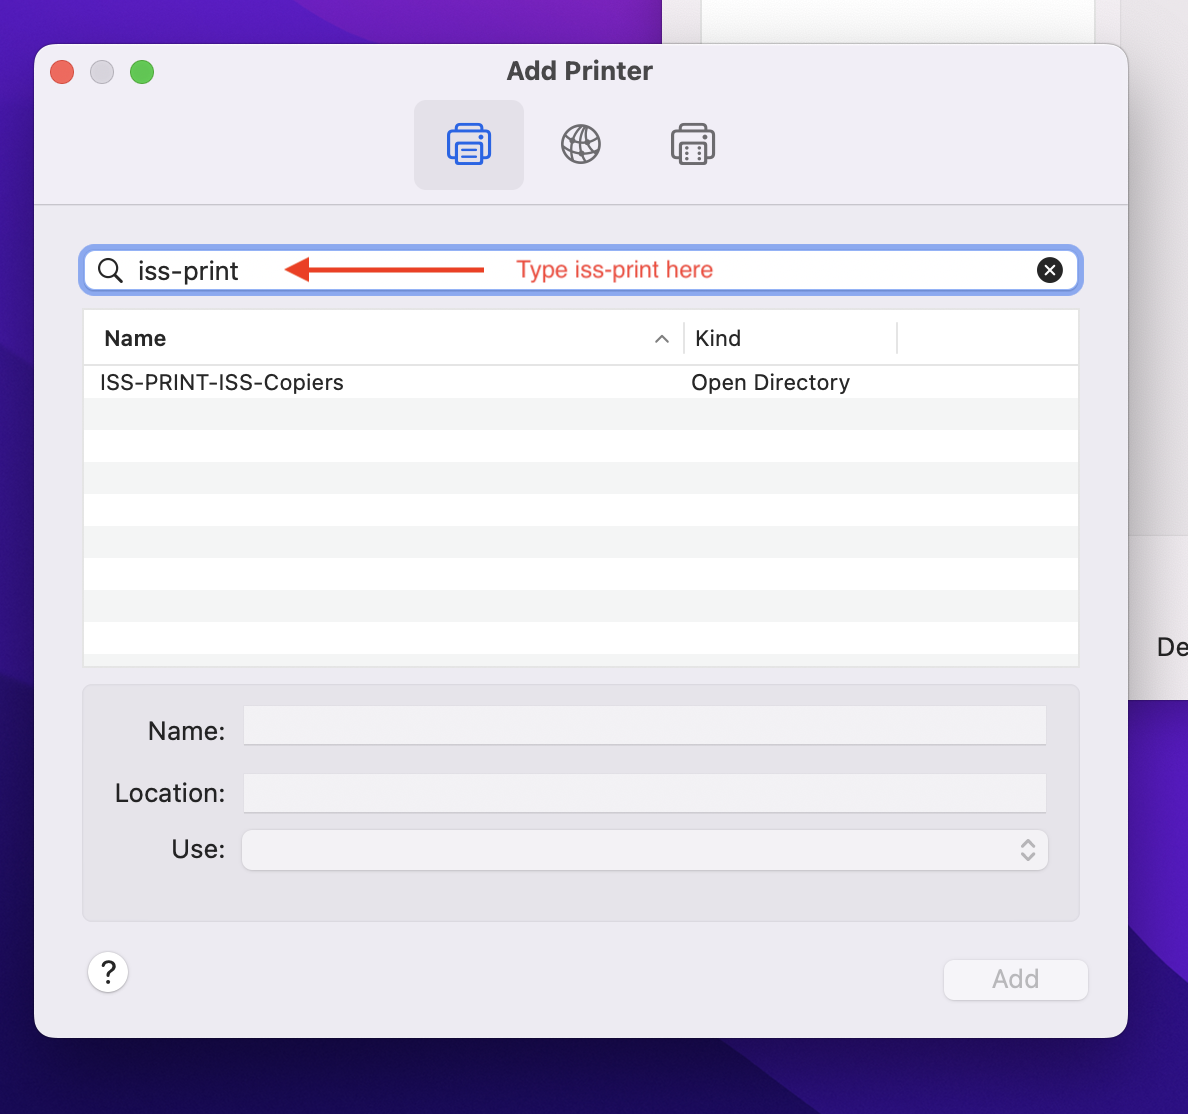
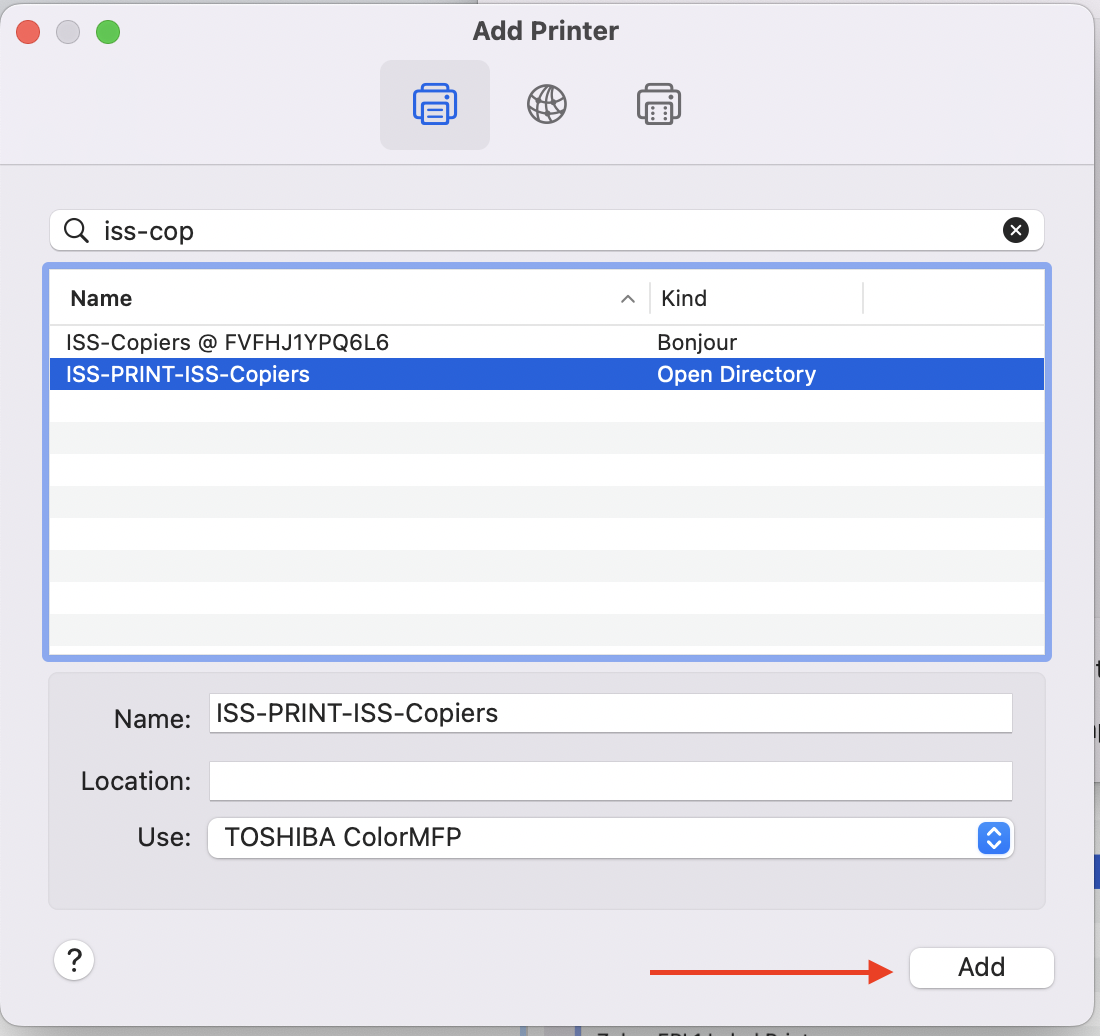
5. You will see a long list of printers here. Search for ISS-Print
|
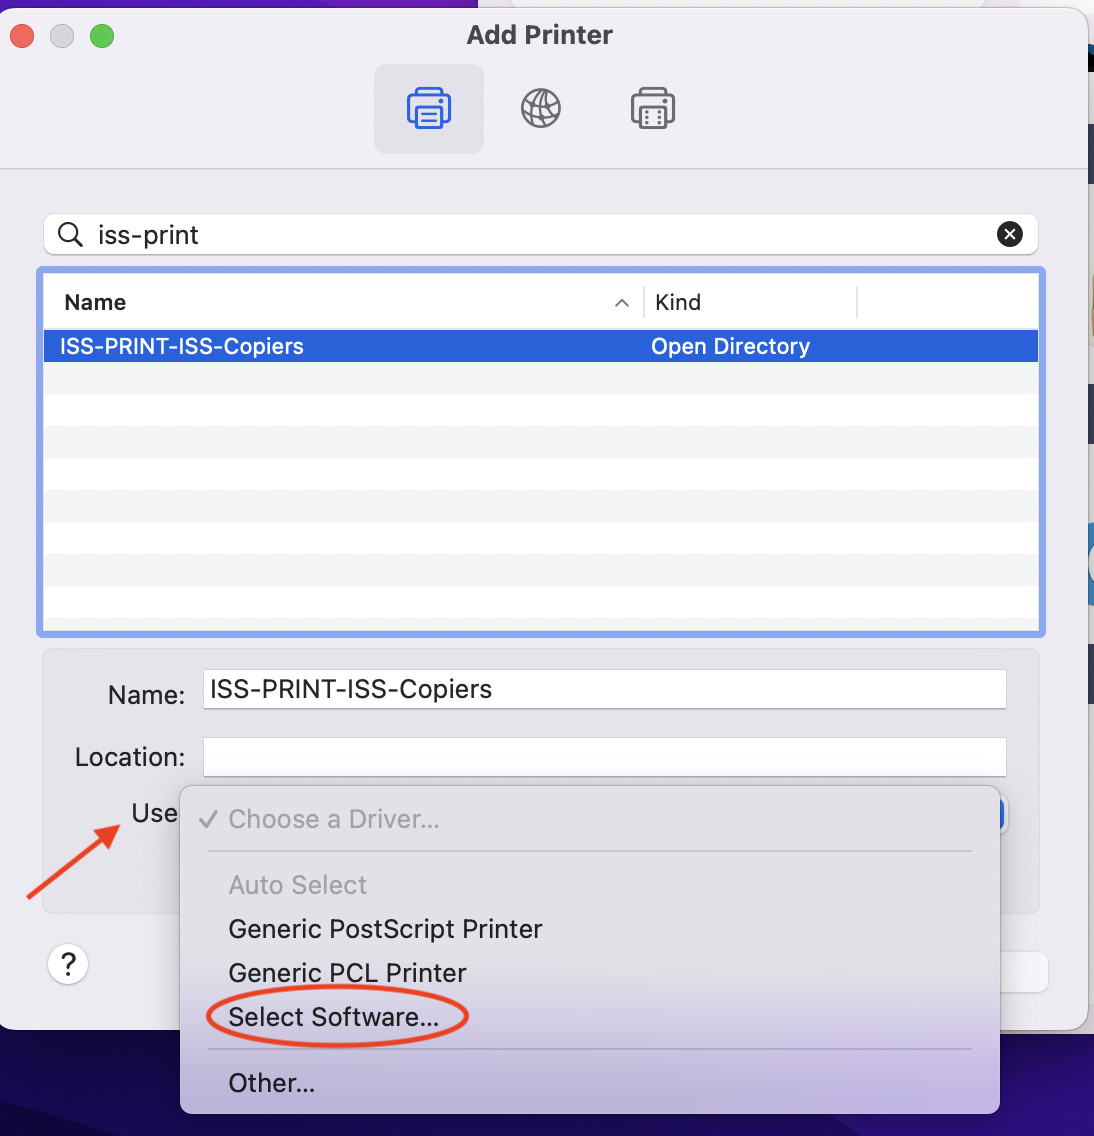
6. Select ISS-Print-ISS-Copiers, and then choose the drop down beside use and then Click Select Software
|
|
|
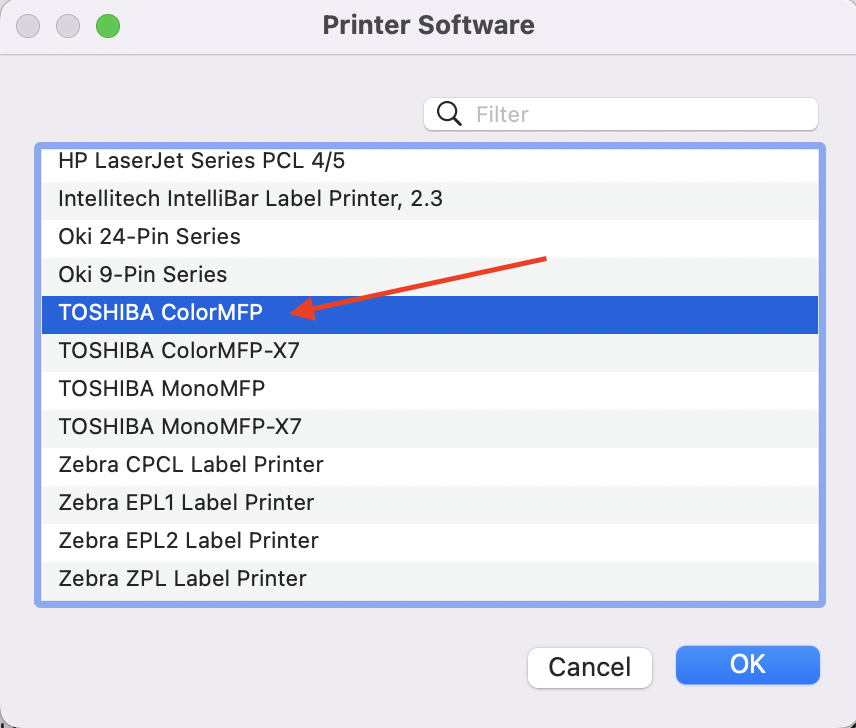
7. Scroll to the bottom and choose the TOSHIBA ColorMFP Driver, and then click OK.
|
8. After Selecting the Driver, click Add
|
|
|
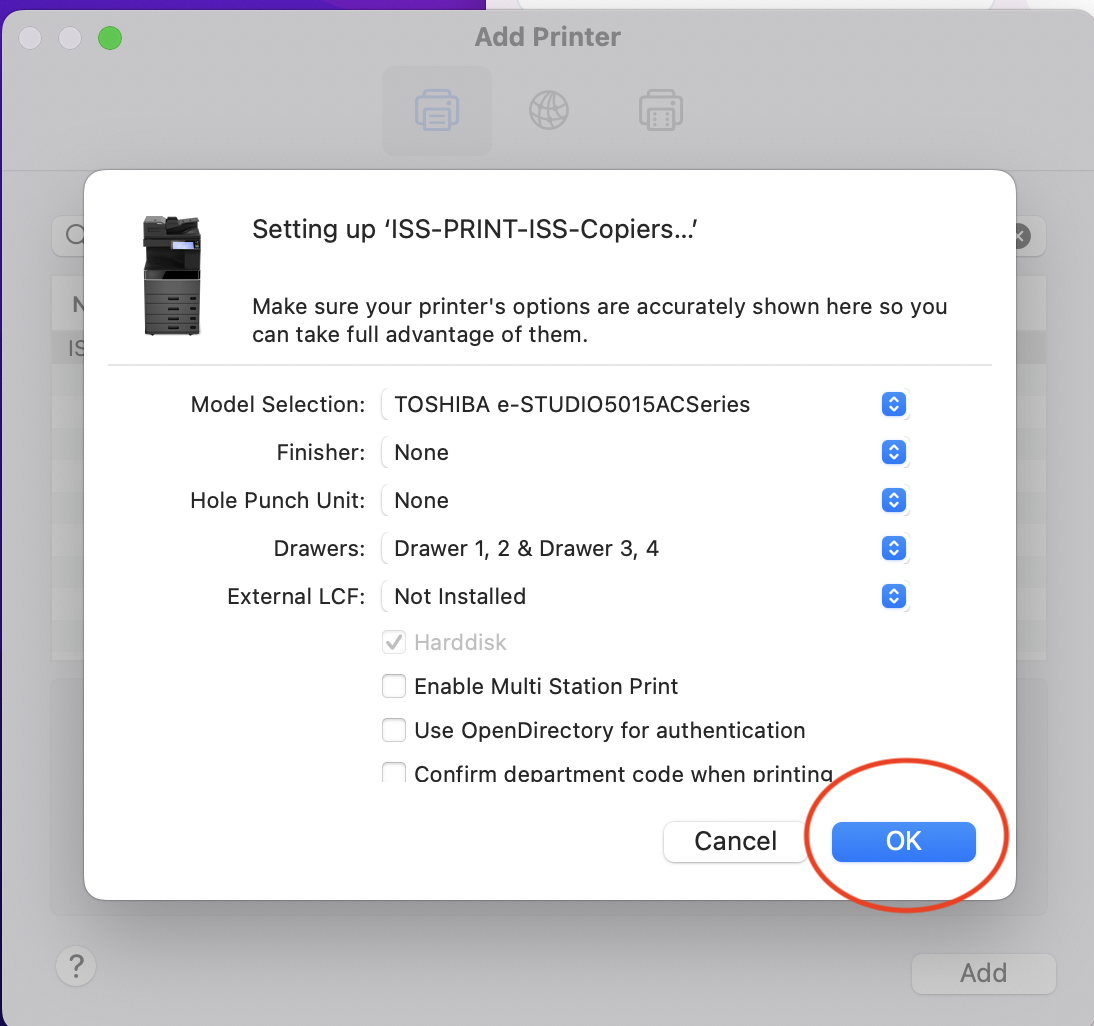
9. You will get a popup window with many options, just click OK.
|
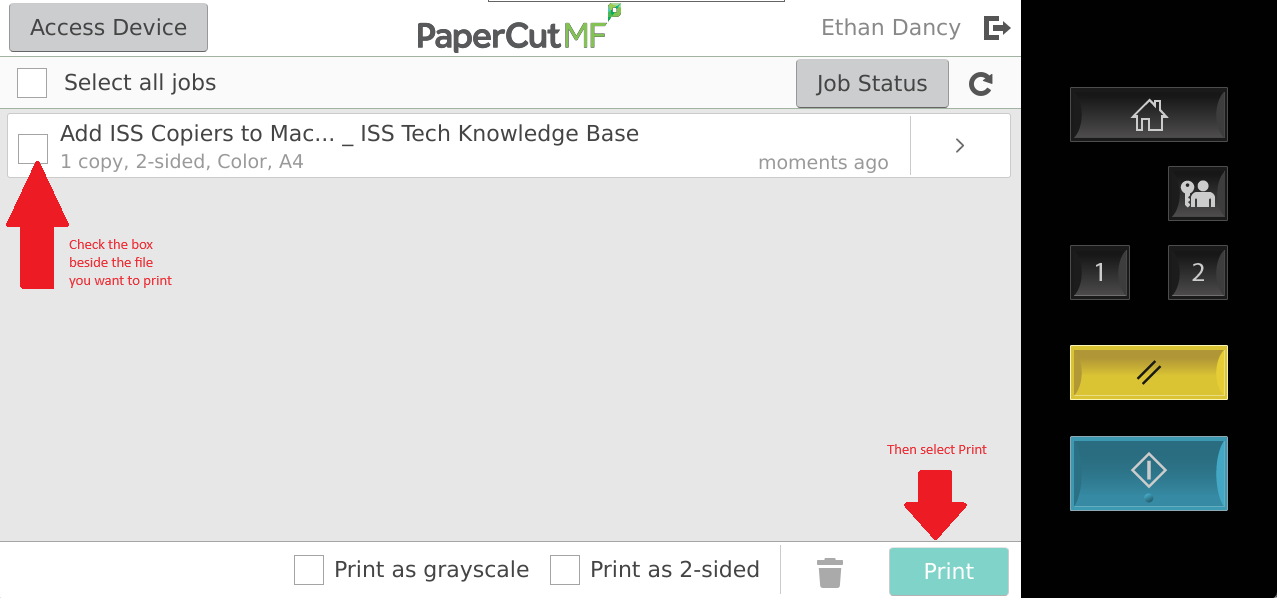
10. Now, when you print to the printer named ISS-Print, you can go to any ISS Copier in the building, and retrieve the job via your timekeeper number.
|
|
How to Print to Copiers on a Mac
|
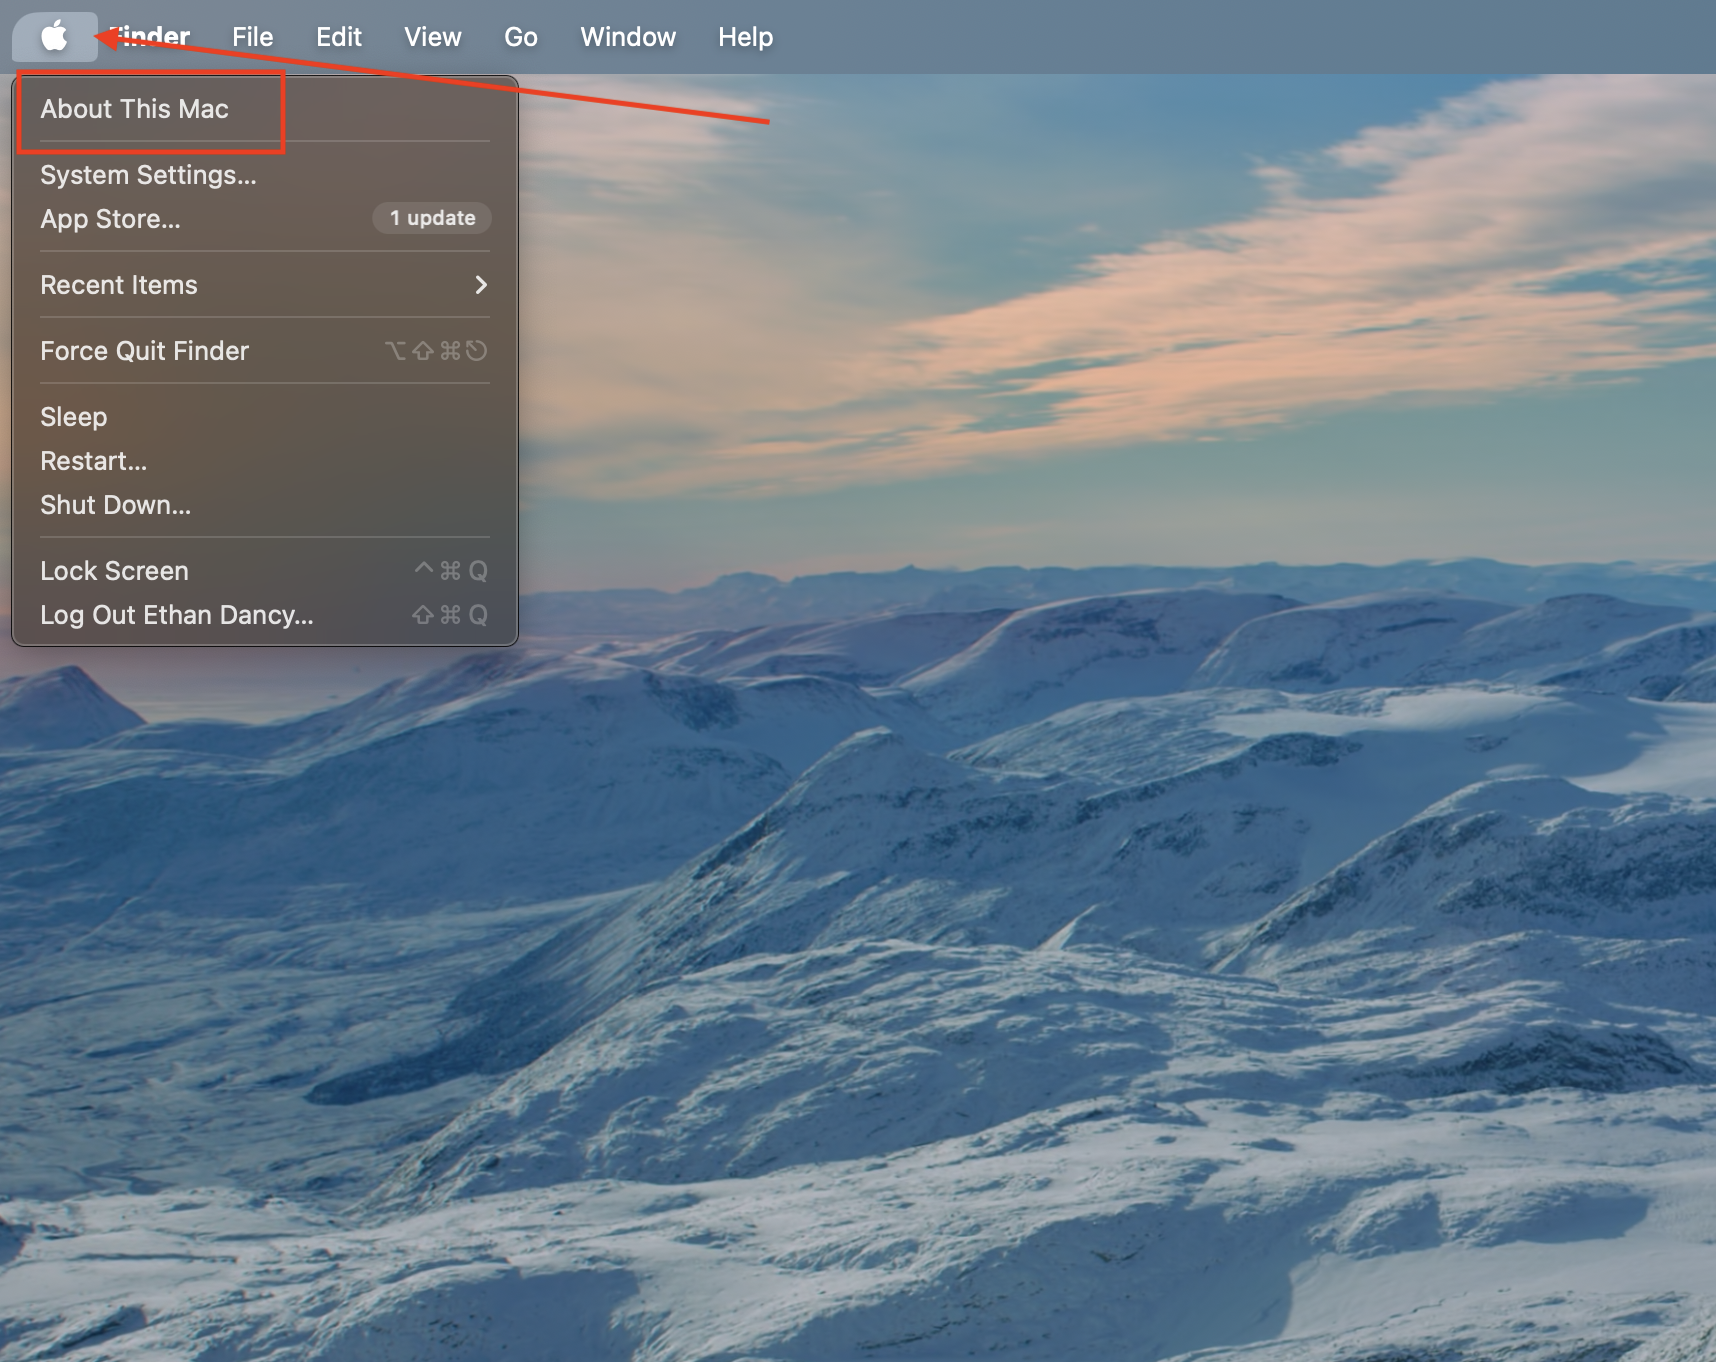
Click About this Mac in the Top Left
|
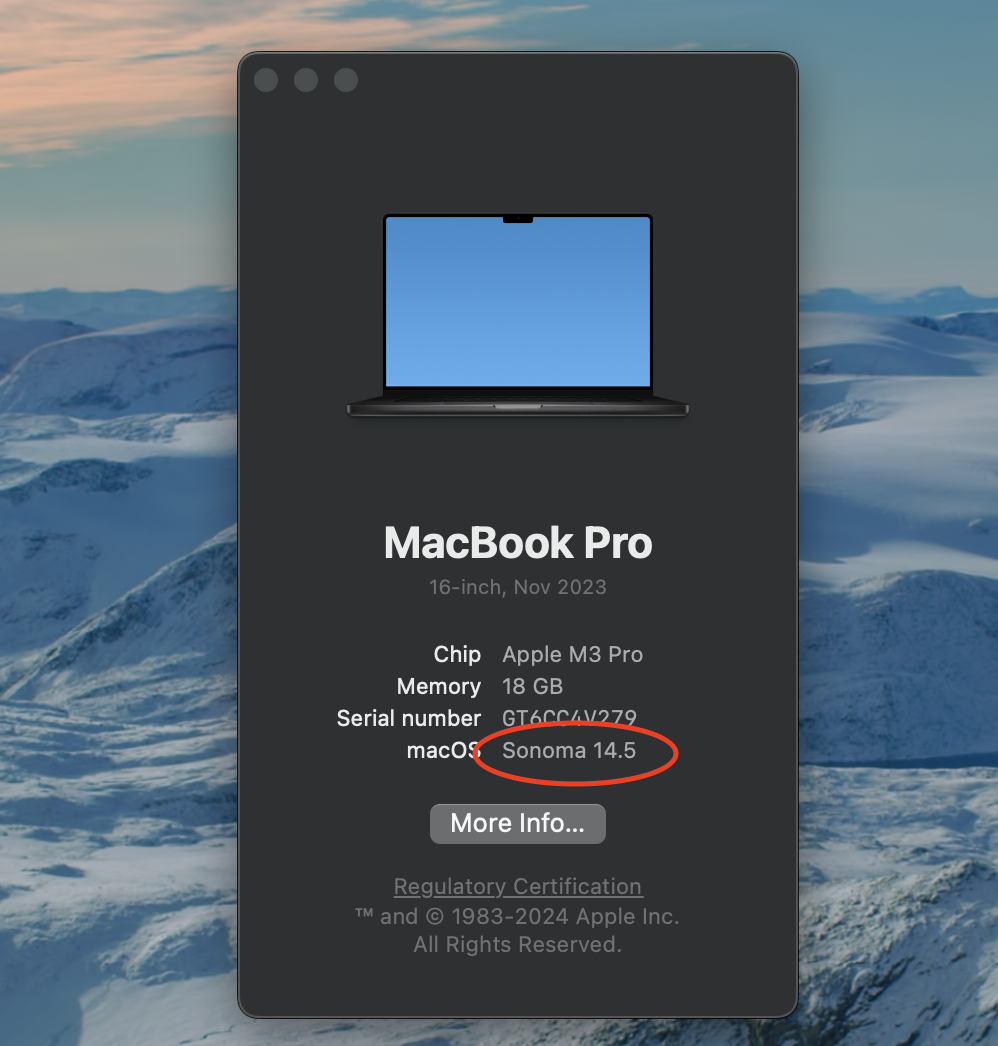
Look at your Mac OS Version
|
| If your macOS version is Sonoma, follow the below instructions: How to Print with Papercut on Macbook | If your macOS version is Mojave, Big Sur, Catalina, Ventura, Monterey then follow the below instructions: Add ISS Copiers to Macbook (Pre OS Sonoma) |