Gmail
- How to Setup Multi Factor Authentication for Gmail
- Use Gmail App for Multi-factor Authentication
- How to Setup GAuth Authenticator with Gmail
- How to change Cell Phone number for 2 Factor Authentication
How to Setup Multi Factor Authentication for Gmail
Step 1. Go to https://myaccount.google.com/ and make sure you are signed into Gmail with your ISS Account
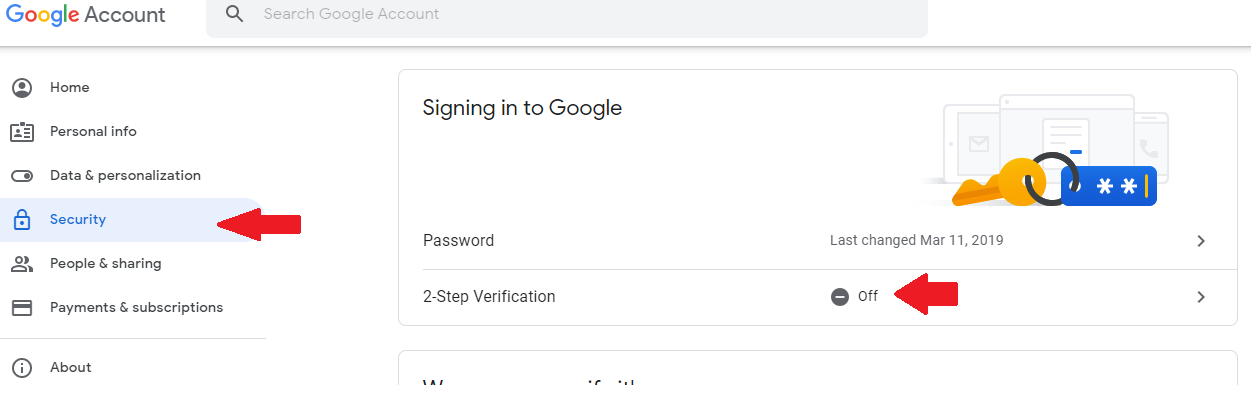
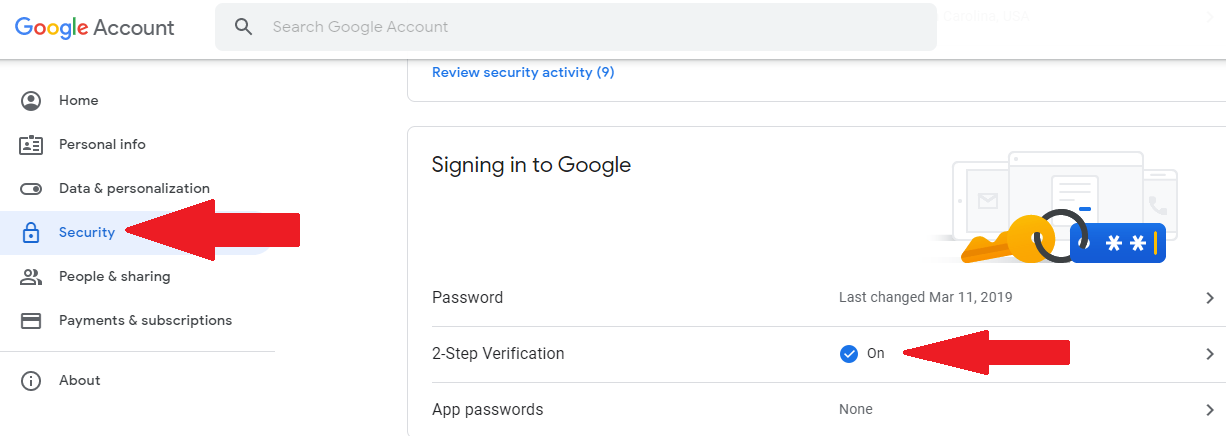
Step. 2. Click Security on the left hand side of the screen, and then click where it says Off beside 2-Factor Verification (Pictured below)
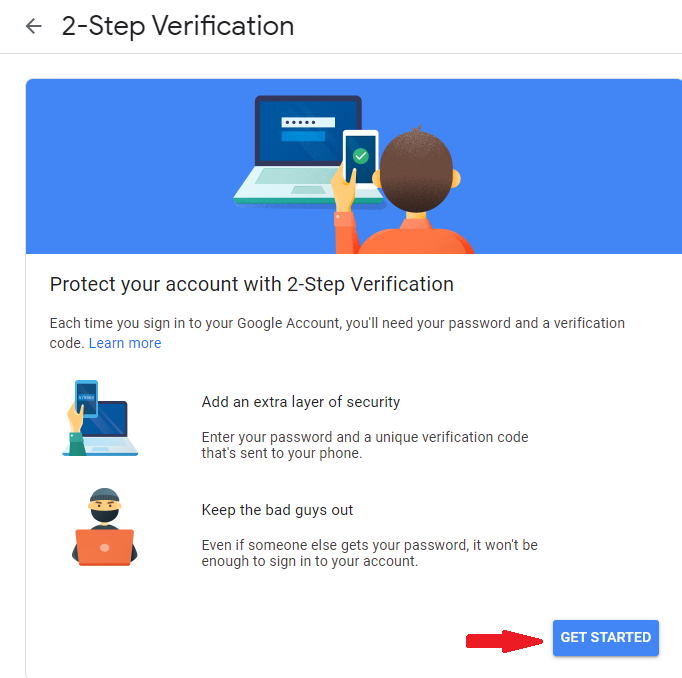
Step 3. Click Get Started on the next page (pictured below) and it may prompt you to sign in again.
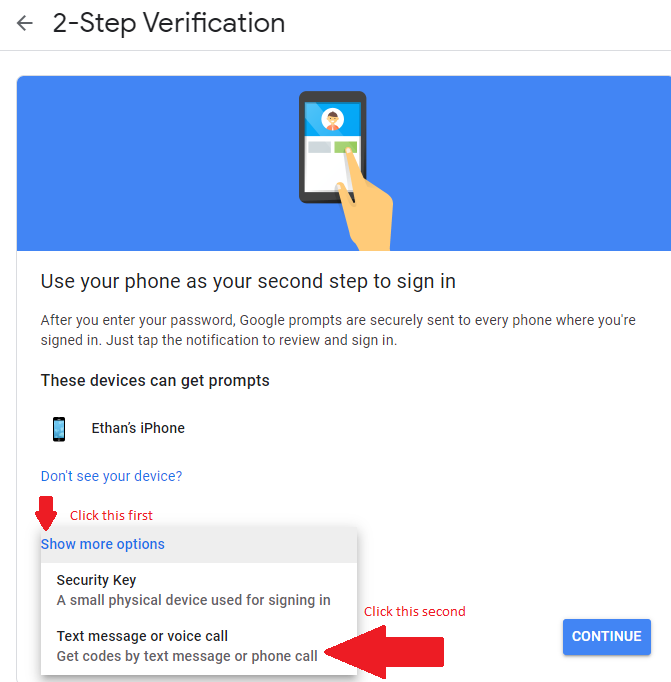
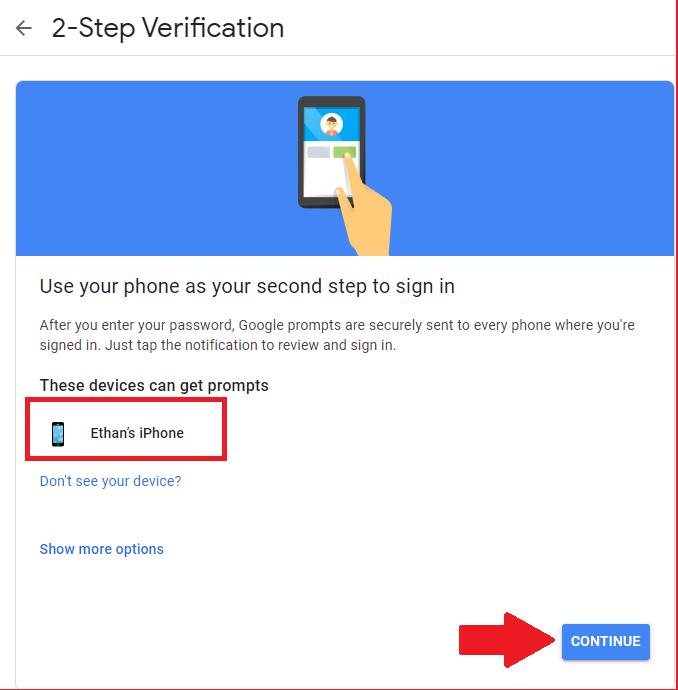
Step 4. If you have the Gmail App on your phone that is signed into your ISS Email account, you will see something that says "These devices can get prompts" and you will see something that says your Phone name. (Photo below) If you use the Gmail App on your phone, please click here for further instructions. If you are NOT using the Gmail App or you DO NOT WANT to use the Gmail App, Please continue to the next step. (Photo below)

Step 5. Click Show more options and then click Text message or voice call (Photo below)
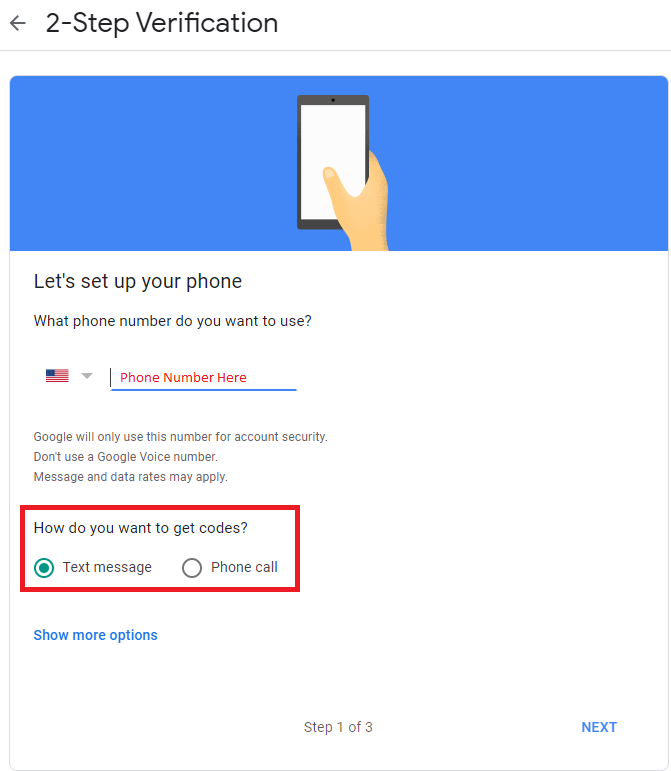
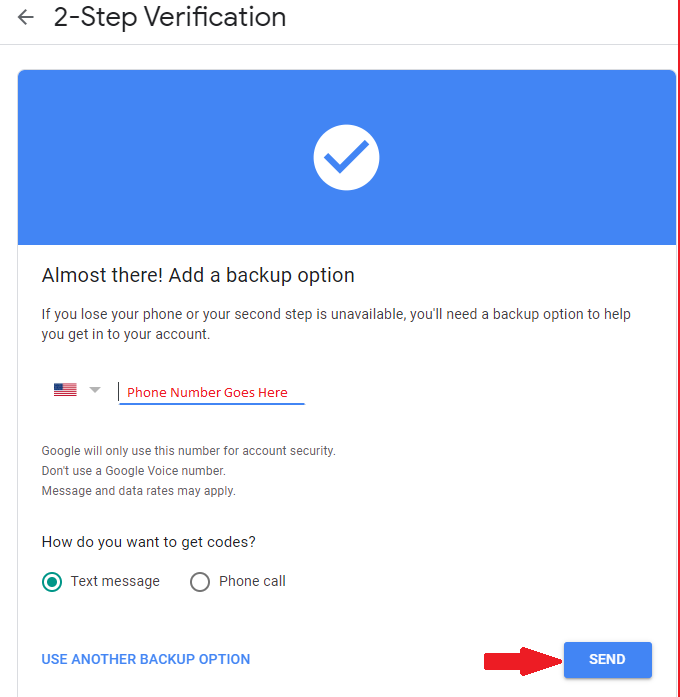
Step 6. Enter your cell phone number in the field for your phone number. You can choose whether you want to receive a code via text message, or via phone call and then click Next. (Photo below)
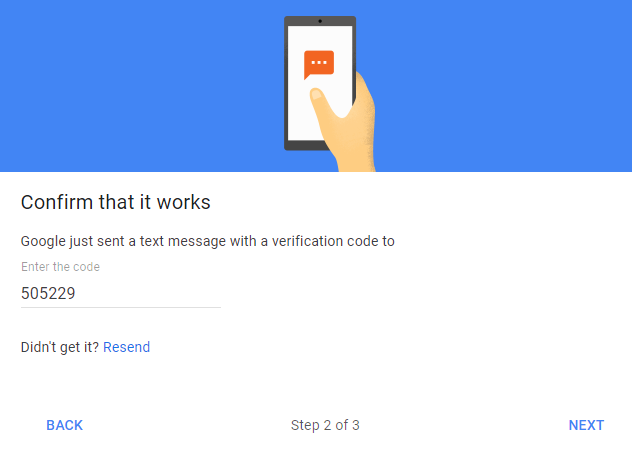
Step 7. If you choose text message, Google will text you a Google Verification Code. You will then enter the code without the G- in front into the text box. (Photo below)

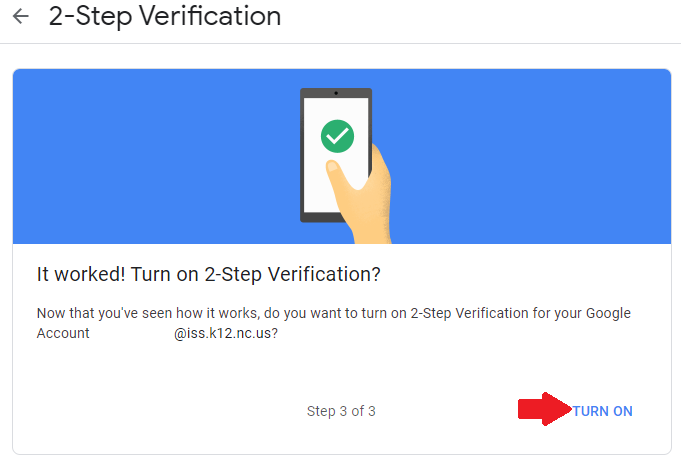
Step 8. Click Turn On to confirm that you want to turn on 2-Step Verification. (Photo below)
Here is a video on the steps to setup Multi Factor Authentication
Use Gmail App for Multi-factor Authentication
IF YOU DO NOT USE THE GMAIL APP ON YOUR PHONE, PLEASE DO NOT USE THE INSTRUCTIONS BELOW, Please CLICK HERE for instructions WITHOUT the App.
Step 1. Go to https://myaccount.google.com/
Step. 2. Click Security on the left hand side of the screen, and then click where it says Off beside 2-Factor Verification (Pictured below)
Step 3. Click Get Started on the next page (pictured below) and it may prompt you to sign in again.
Step 4. If you have the Gmail App on your phone that is signed into your ISS Email account, you will see something that says These devices can get prompts and you will see something that says your Phone name. (Photo below) Make sure your device is there and selected and then click continue.
Step 5. It will make you enter a phone number, just to be safe. Please enter your phone number, and then choose either a text message or a phone call to confirm and then press Send.
Step 6. If you choose text message, Google will text you a Google Verification Code. You will then enter the code into the text box, without the G- and then click Next
Step 7. The next time you sign in, it will prompt you to confirm on your phone. Make sure to click the check box beside Don't ask again on this device if you would like to stay logged in on this device. (Photo below)
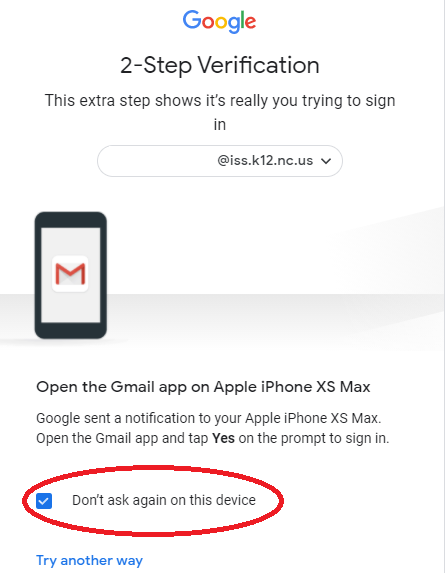
Step 8. When you are on this screen, you will need to open the Gmail App on your phone and confirm whether or not you are the person trying to sign in to the device. After you choose Yes on your phone, you should then be signed into Gmail on the computer.

How to Setup GAuth Authenticator with Gmail
Please make sure you have enabled Two Factor Authenticator in Gmail. If this has not been done, please follow the instructions listed here.
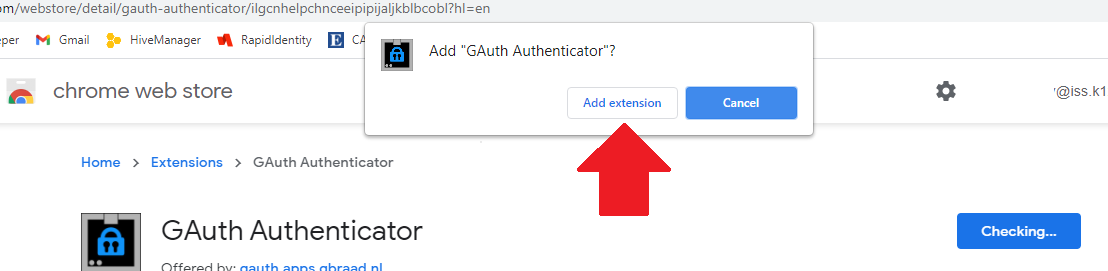
Step 1. Please add the Chrome Extension GAuth Authenticator by clicking here and click Add to Chrome. (Pictured Below)
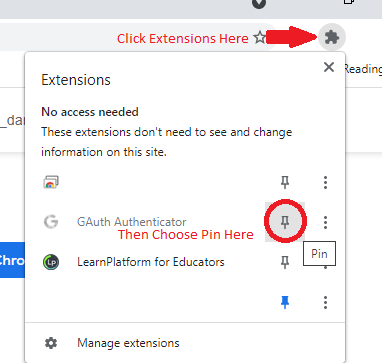
Step 2. In the Top Right Hand corner of the screen, choose the extensions icon that looks like a puzzle piece. After you click on that, then click on the thumbtack beside of GAuth Authenticator to Pin GAuth Authenticator. (Pictured Below)
Step 3. Go to https://myaccount.google.com/
Step. 4. Click Security on the left hand side of the screen, and then click where it says On beside 2-Factor Verification (Pictured below)
Step 5. Scroll down, and find where it says Authenticator app and then click SET UP (Photo Below)

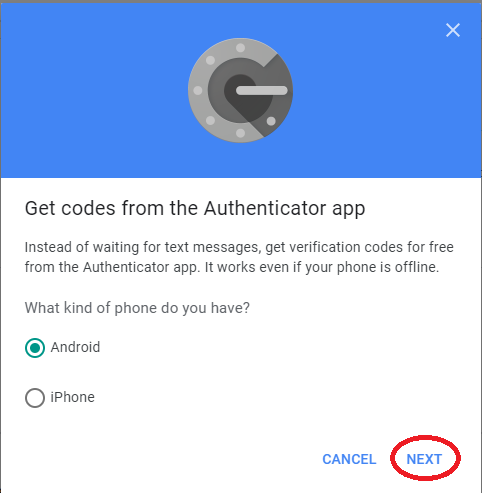
Step 6. You can leave the selection on Android, and then click Next. (Photo Below)
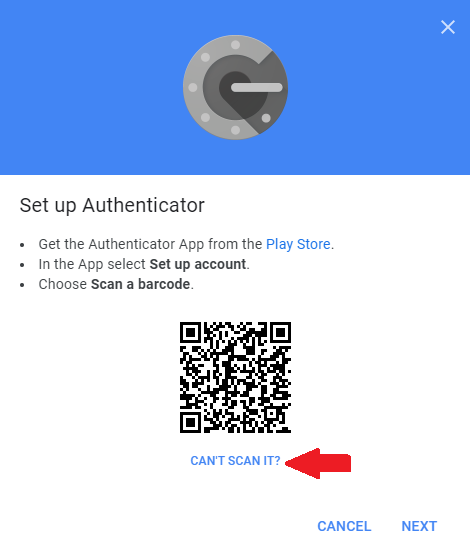
Step 7. On the next screen, you will Choose Can't Scan It? below the QR Code. (Photo Below)
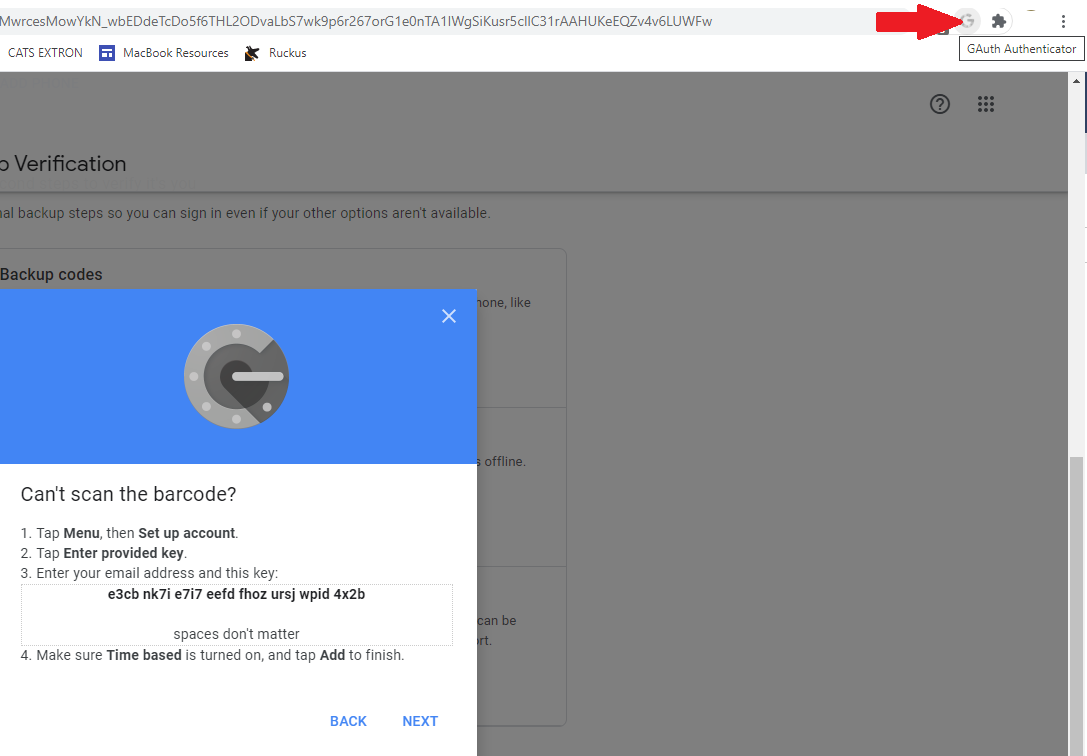
Step 8. Next you will Click on GAuth Authenticator icon in the top right.
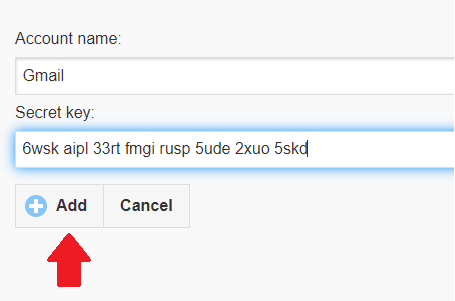
Step 9. On the next step, you will need to select the pencil in the top right, and then click Add. (Photo Below)

Step 10. You will then go to Add the Account - Make the Account Name Gmail or ISS Gmail, then you will have to go back to the Chrome tab that has the Key (from Step 8) and then paste it in the text box that says Secret key and then click Add.

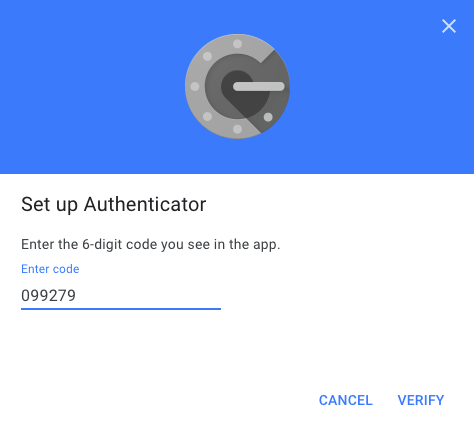
Step 11. Copy the Code that GAuth Authenticator gives you, go back to the Google Accounts Page, and click Next and paste the code there and click verify.

Now, every time that you need a 2 factor authenticator code, you can click on the G-Auth Extension in the top right, and get the code for gmail and copy and paste it in as your 2 factor authentication code.
Below is a video of how to set it up, click here if the video does not work.
How to change Cell Phone number for 2 Factor Authentication
1. Sign into your email on a Windows computer or MacBook.
2. Navigate to your email
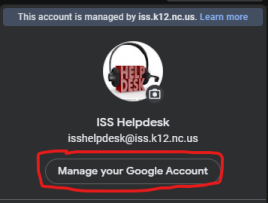
3. Click the circle next to the ISS banner in the upper right hand corner a. It will either have the first letter of your first name or your profile picture

4. Click “Manage your Google Account”
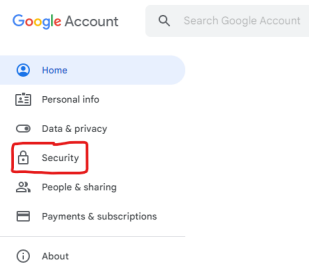
5. Click “Security”
6. Then under the “Signing in to Google” section
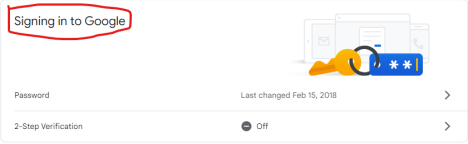
a. Click 2-Step Verfication
7. Then click the arrow next to “Voice or text message”
8. Now you should see a list of the phone numbers set up for 2-Factor Authentication
a. To remove a phone number click the trash can
b. To edit click the pencil